
📦
No inventory
Your books are printed only after a reader places an order.
This tutorial will show you how to connect BookVault to Curios and sell paperbacks, hardcovers, special editions, and other printed books using print-on-demand fulfillment.
Your books are printed only after a reader places an order.
BookVault prints, packs, and ships each order directly to your reader.
Curios manages the transaction, taxes, customer support, fraud, and communication with BookVault.
The purchase is completed through your Curios storefront.
Curios handles payment processing, applicable taxes, customer support, and fraud protection.
The book is printed, packed, and shipped directly to the reader.
Books typically take about 6 days to print and pack, so there is a delay from purchase to when they ship. Curios does all we can to inform the reader of this so their delivery expectations are set appropriately.
Go to https://auth.bookvault.app/authorize and then click the "Sign Up Now!" link toward the top. You'll get walked through the account creation process.
They will send you an email with a button to create a password.
Note: This kind of didn't work for me, so I had to go back to https://auth.bookvault.app/authorize and do an "I forgot my password" to get in. Hopefully that was just due to me testing several accounts.
Once you are in, you will see the BookVault Dashboard and you will want to click "Add a title".
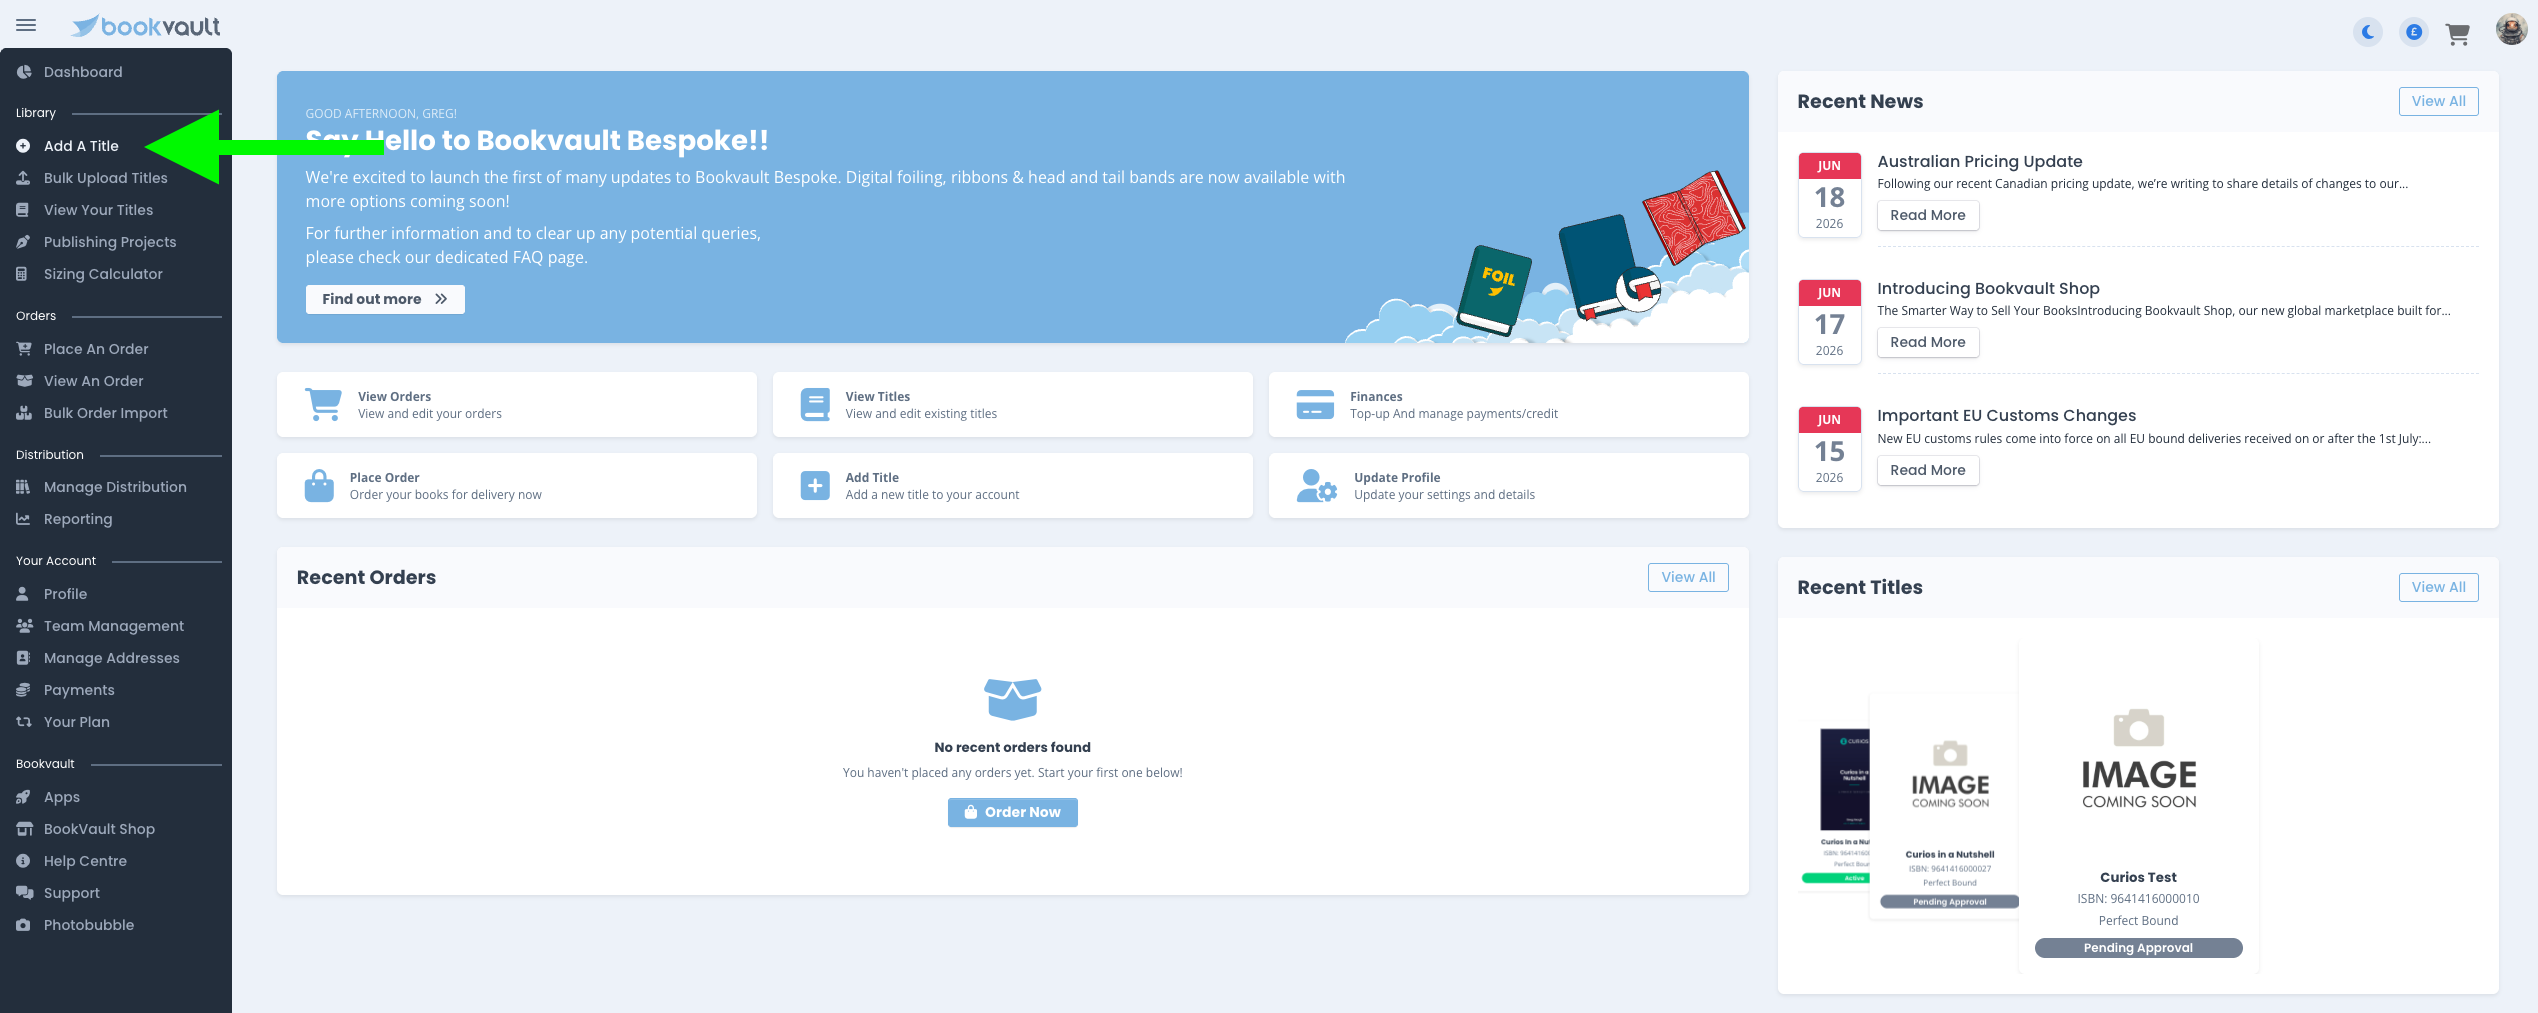
For each title, you will be walked through making selections for paperback, hardcover and more. You will need to walk through the set up for each book AND each format (paperback, hardcover, etc.).
IMPORTANT NOTE: If you use your own ISBN or use a BookVault SKU, you can use the code Curios-T100 to avoid paying any setup fees on BookVault.
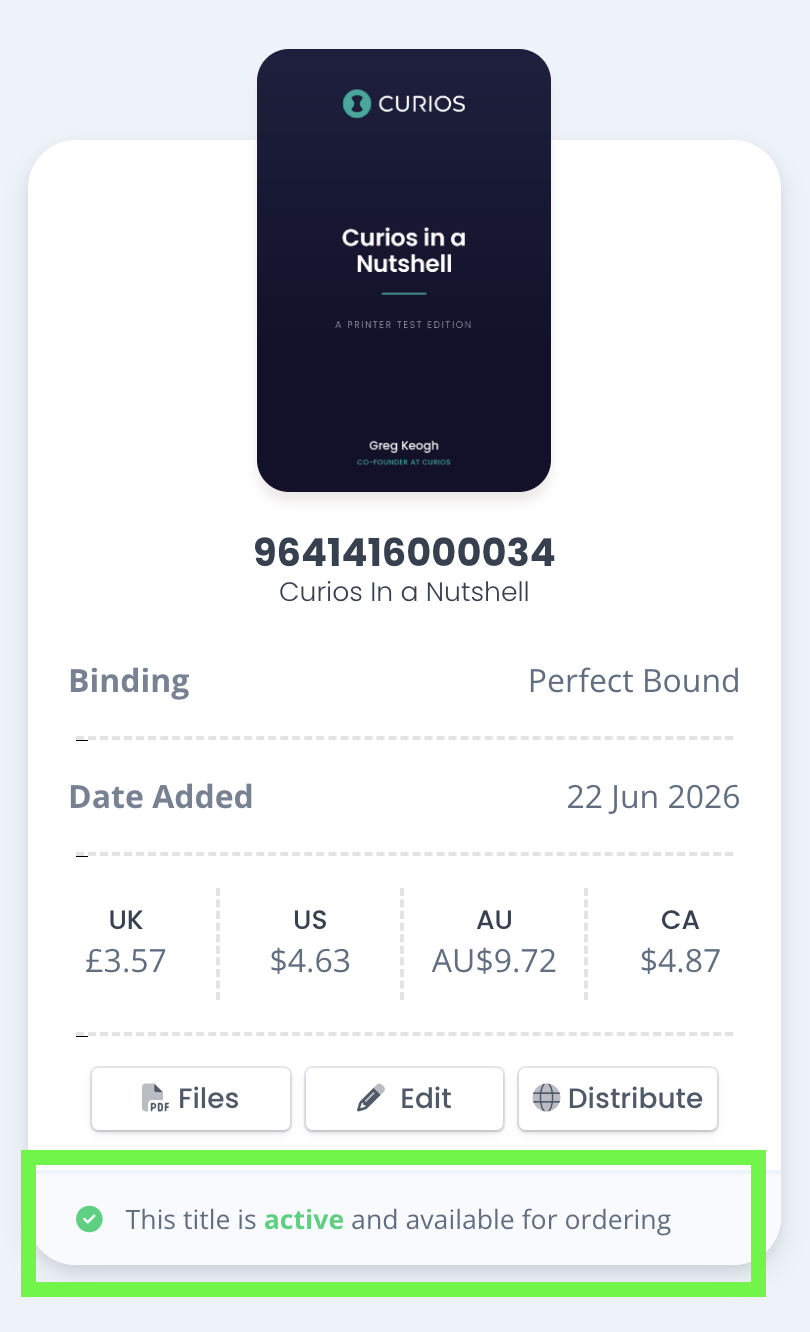
Once you have at least one title set up and ready, it will say "Active and Available for Ordering" on your BookVault dashboard.
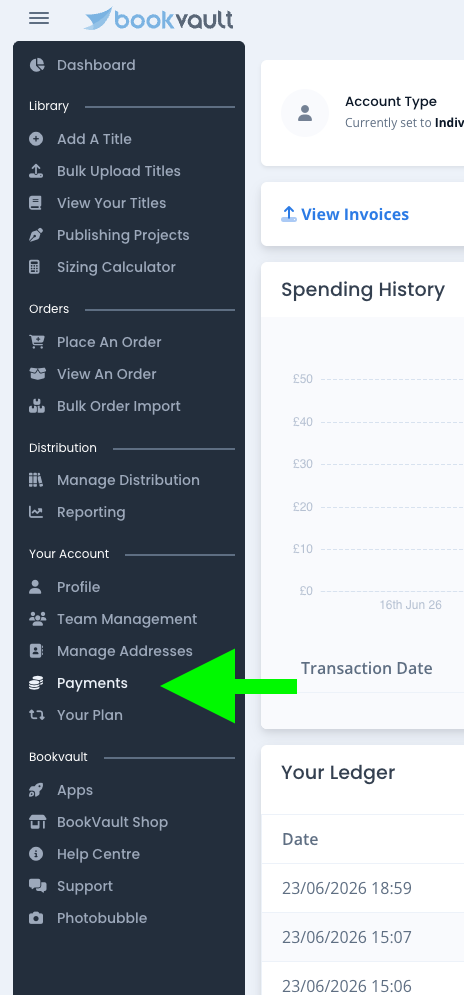
Go to the Payments Tab on the BookVault dashboard. Add your payment information for BookVault printing. You will need to add payment in three places.
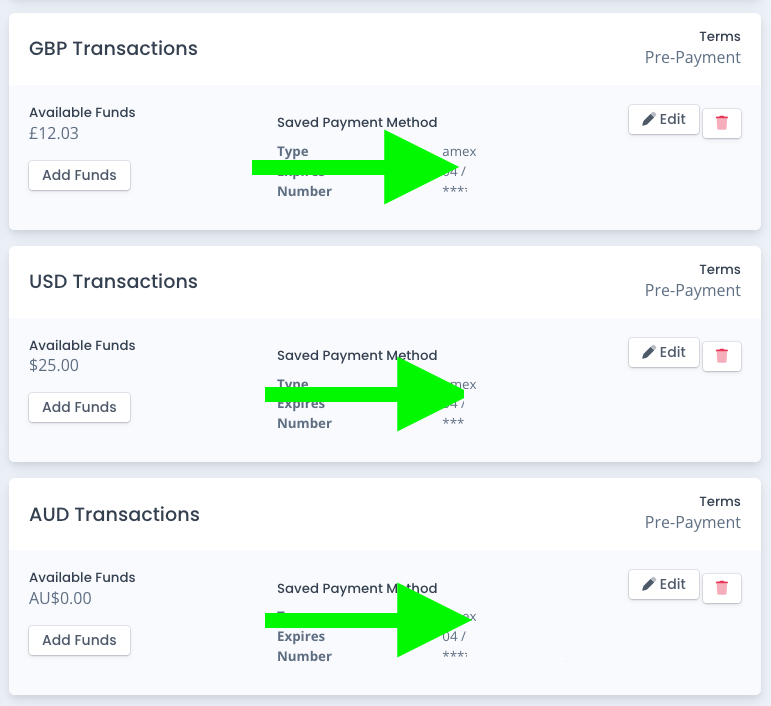
Again, you will need to add the payment information in all three locations. (This is a BookVault requirement and is outside of our control for now.)
Note: For each print-on-demand order, BookVault will charge your payment method on file for the printing, packing, and shipping costs. Orders are only sent to BookVault after they have been successfully processed on Curios, so you will have already received the funds from the sale before these charges occur. A detailed breakdown of how this process works is included at the end of this tutorial.
Note 2: We are urgently working with BookVault's team to have the shipping costs and printing costs come directly from Curios so you would not need a credit card on file with them. This will likely be in place by fall of 2026.
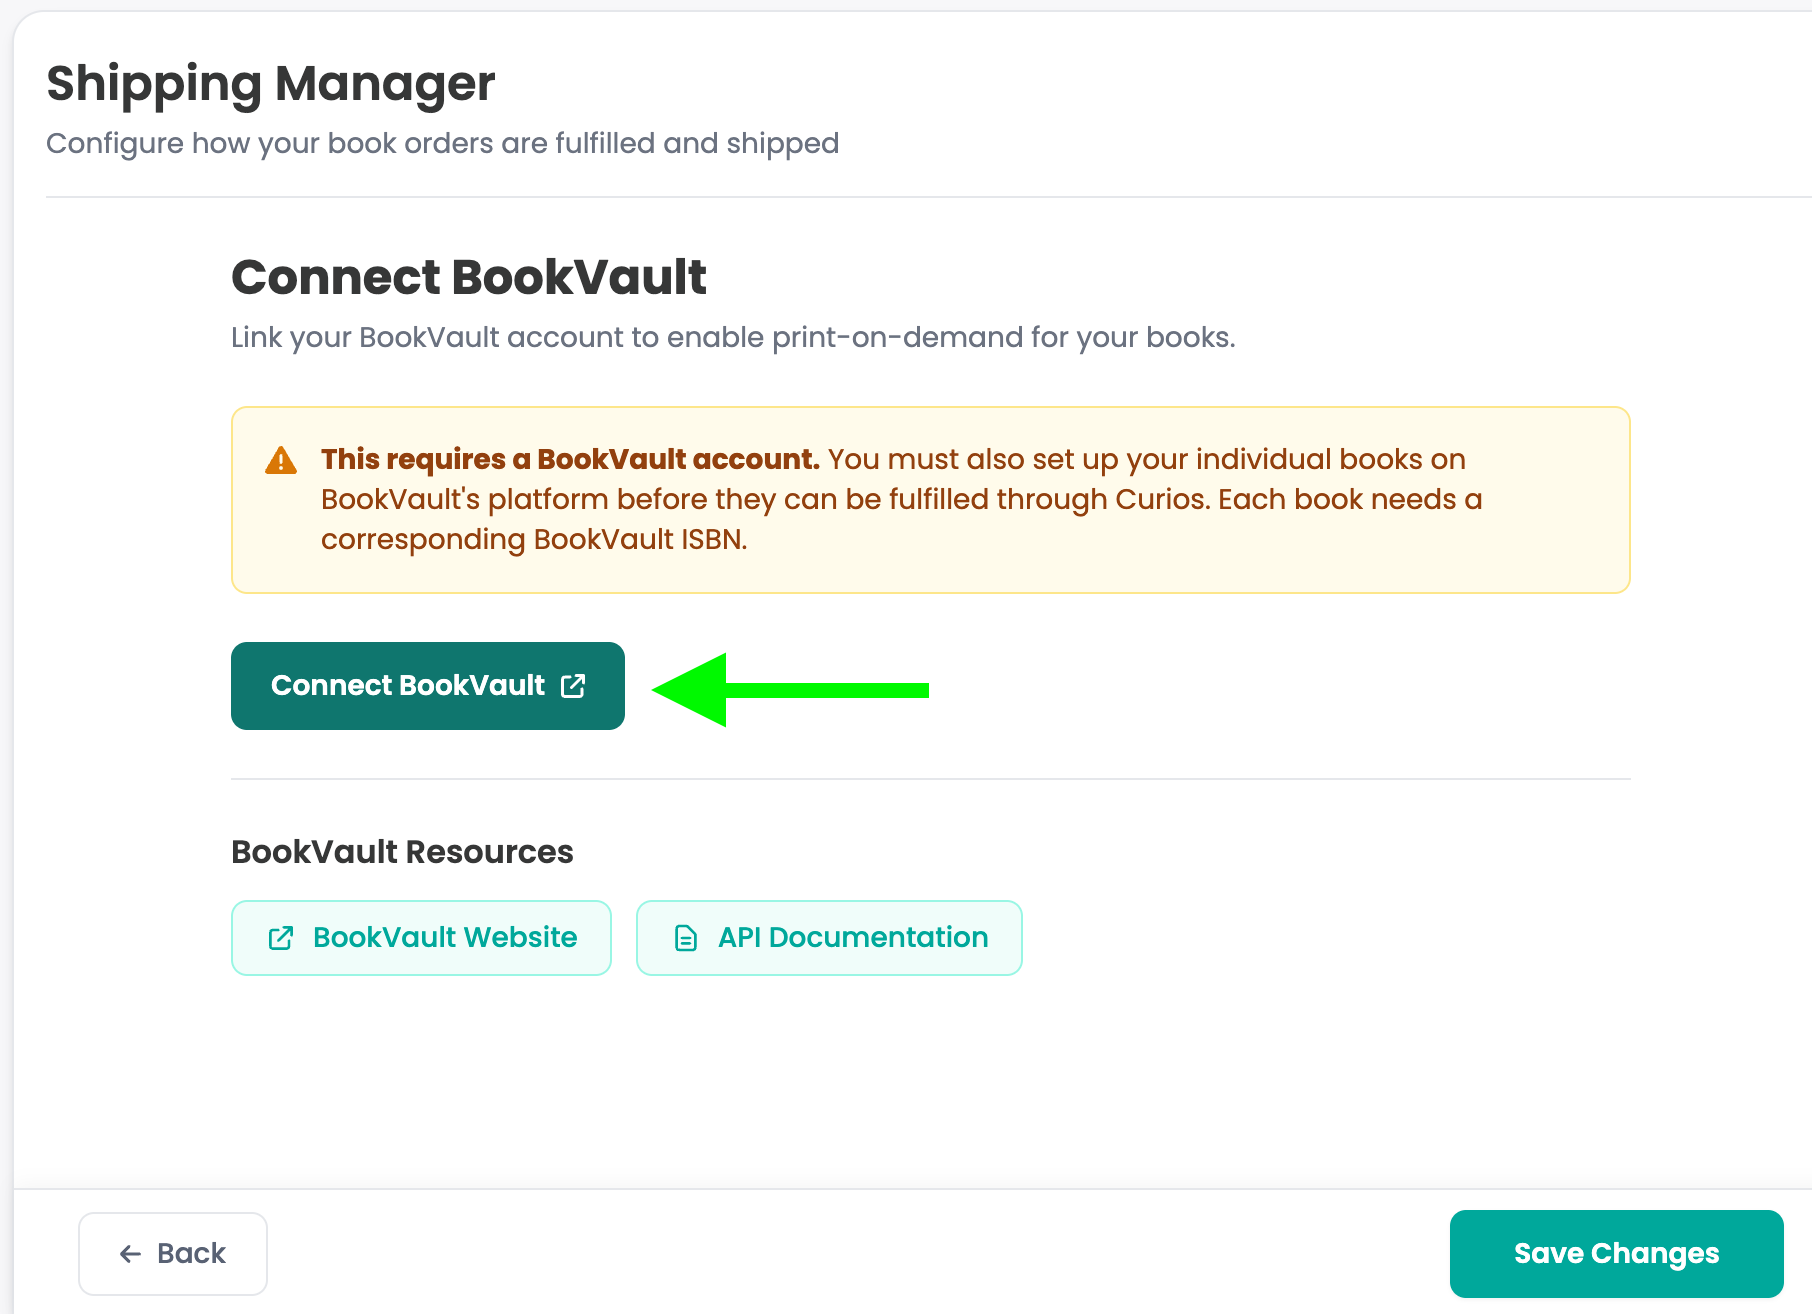
Go to https://portal.bookvault.app/connections/page/curios
or click on the "Connect BookVault" button on the Shipping manager tab on studio.curios.com.
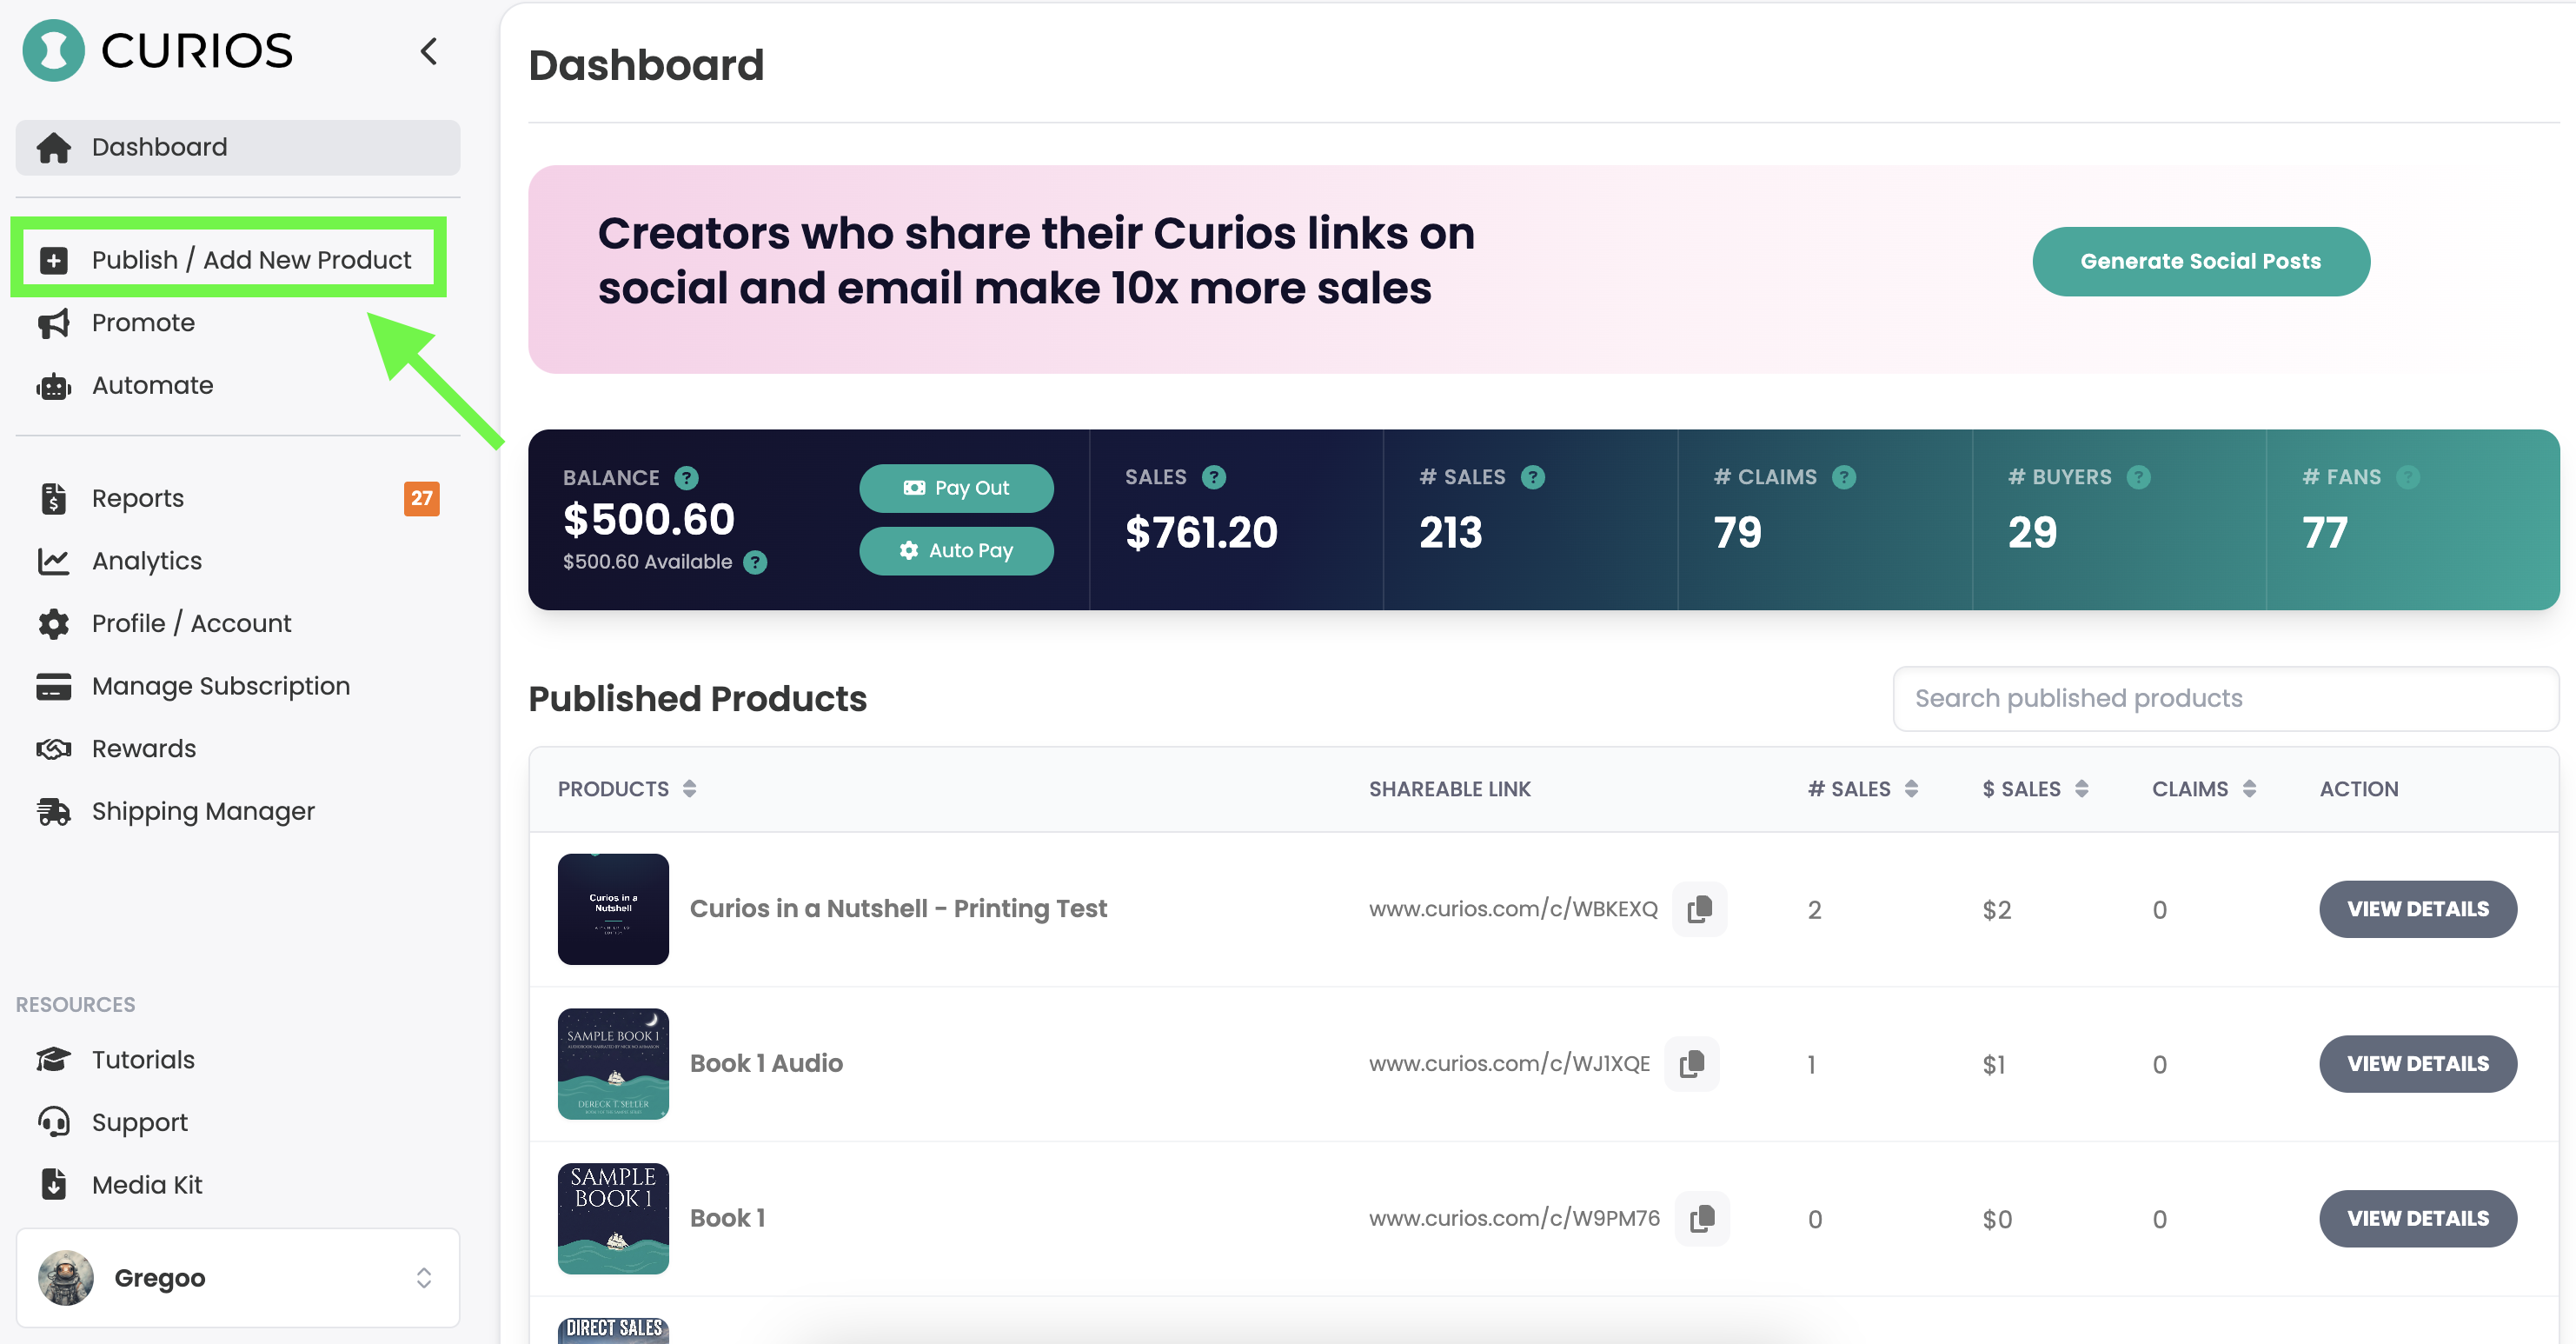
Go to studio.curios.com and login with your email address and then enter the code provided.
Click +Publish/Add New Product option in the left hand menu.
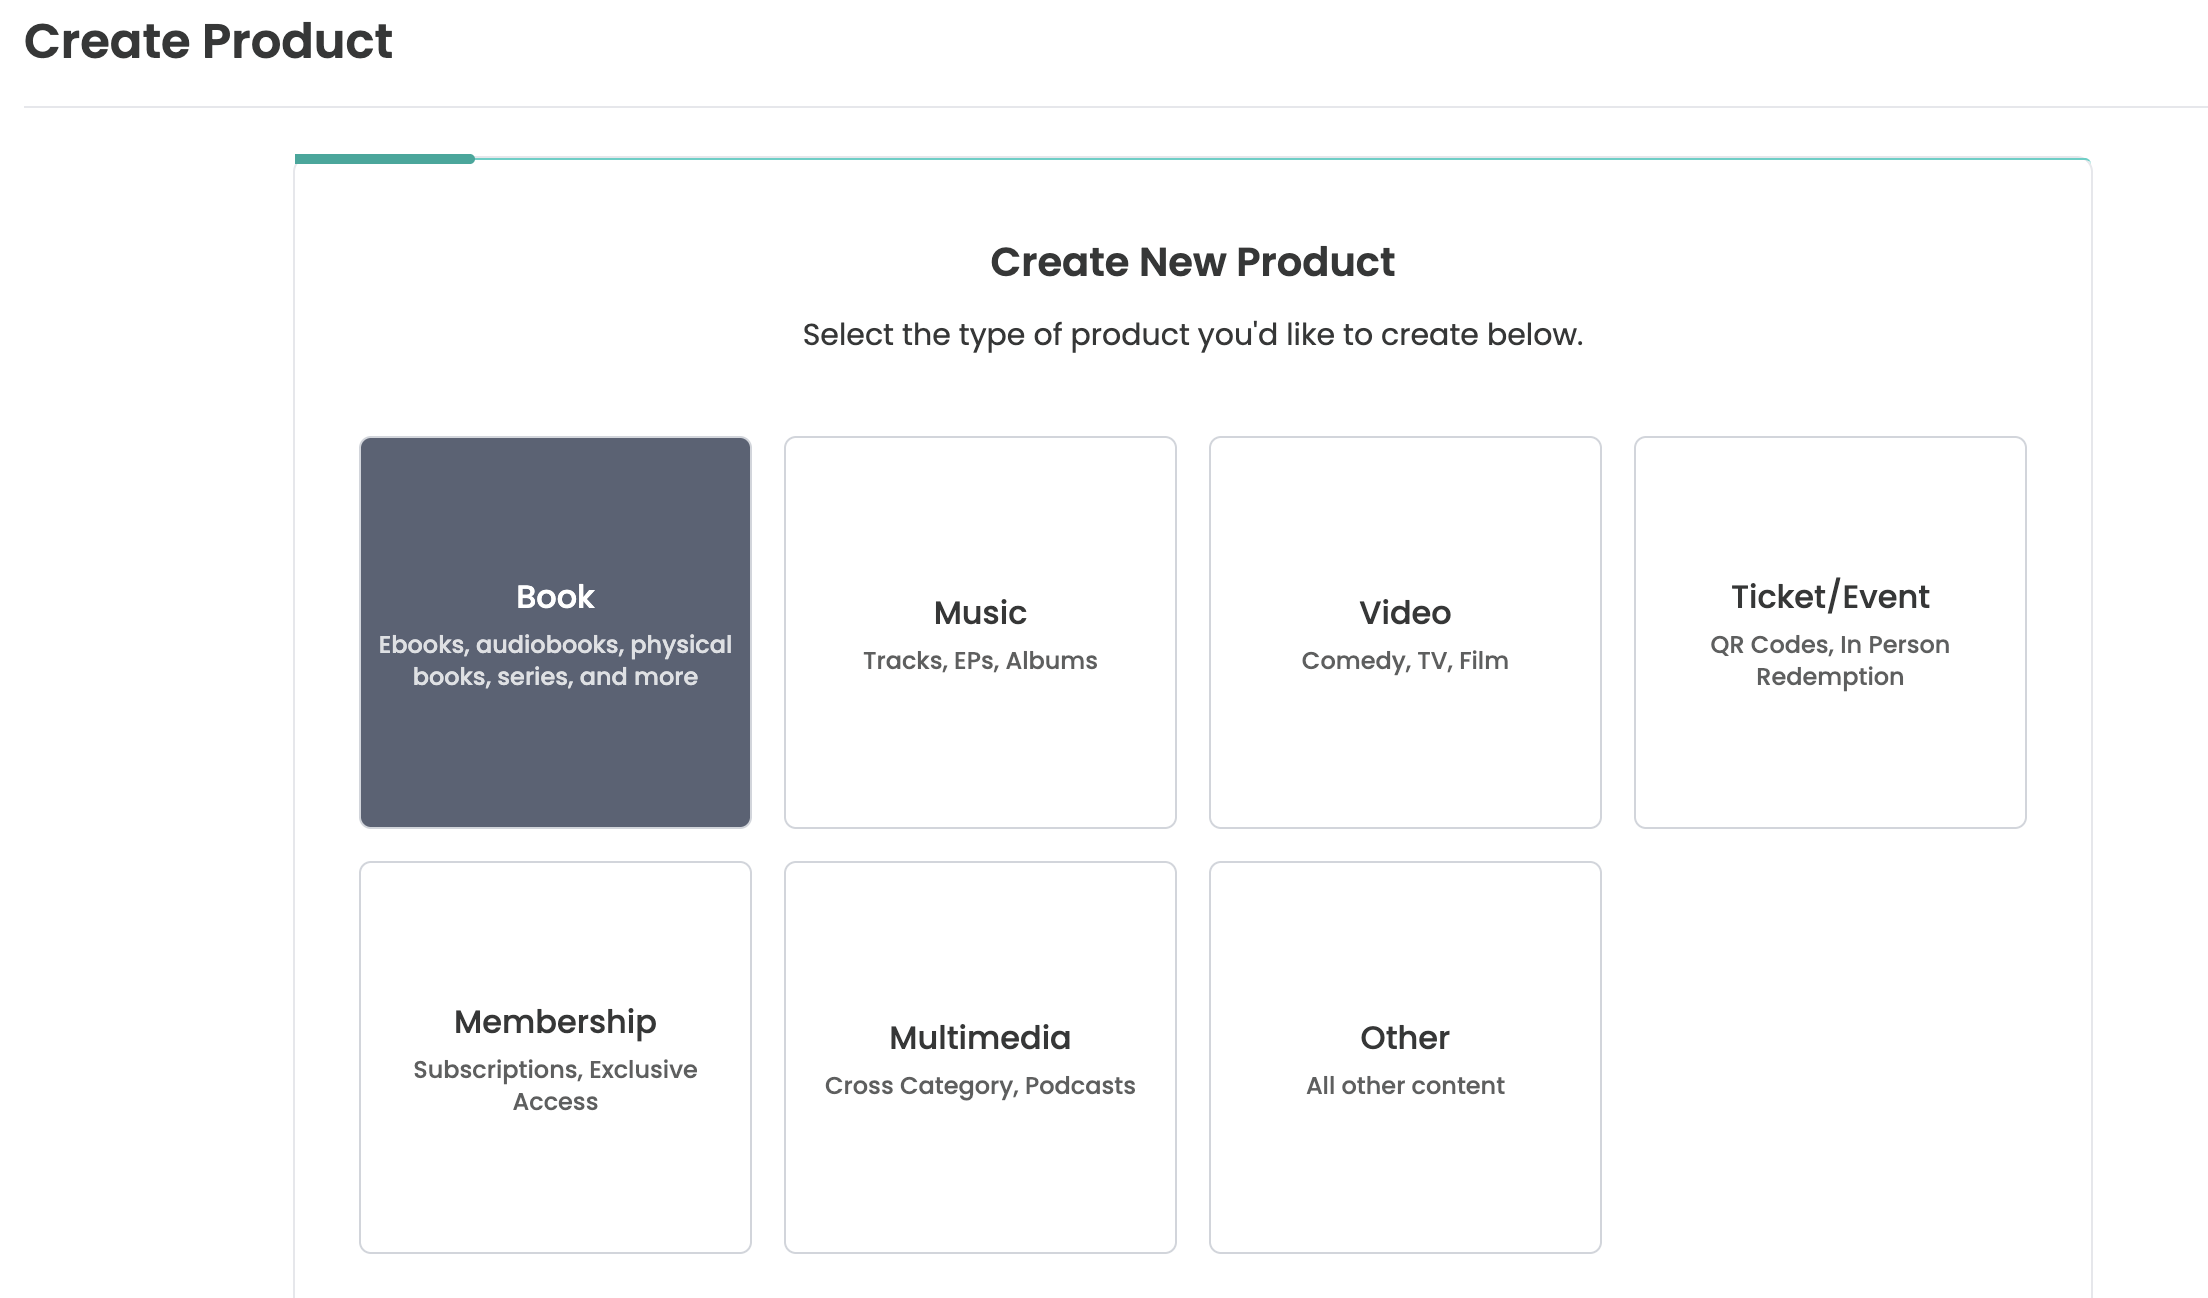
Select Book from the available options.
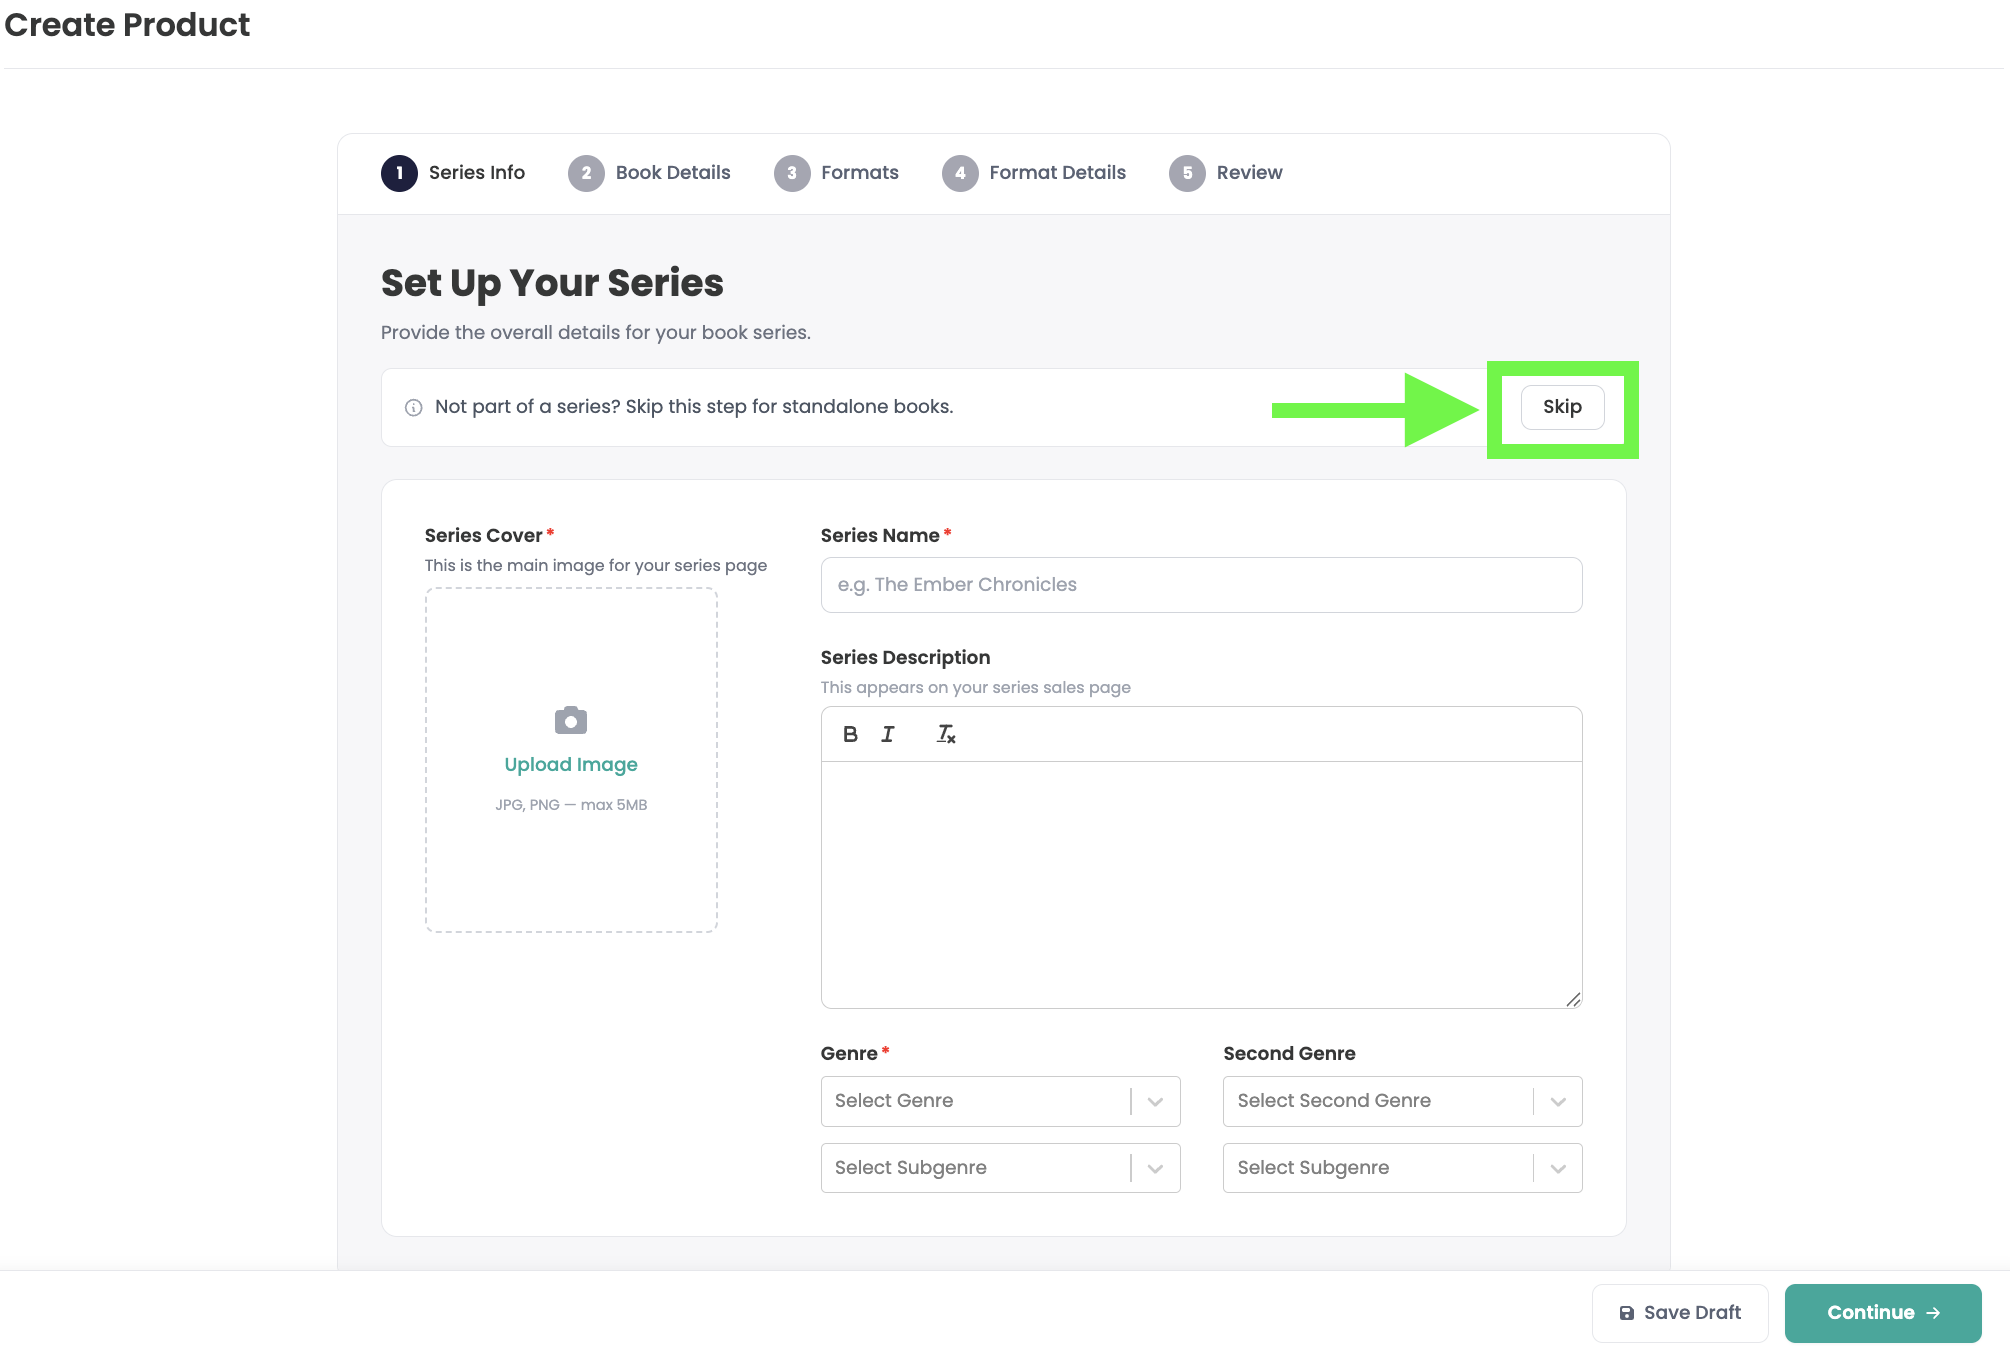
We are going to skip the Series step for this tutorial, but if this book is part of an existing series you can select the series on this page or make a new one if needed.
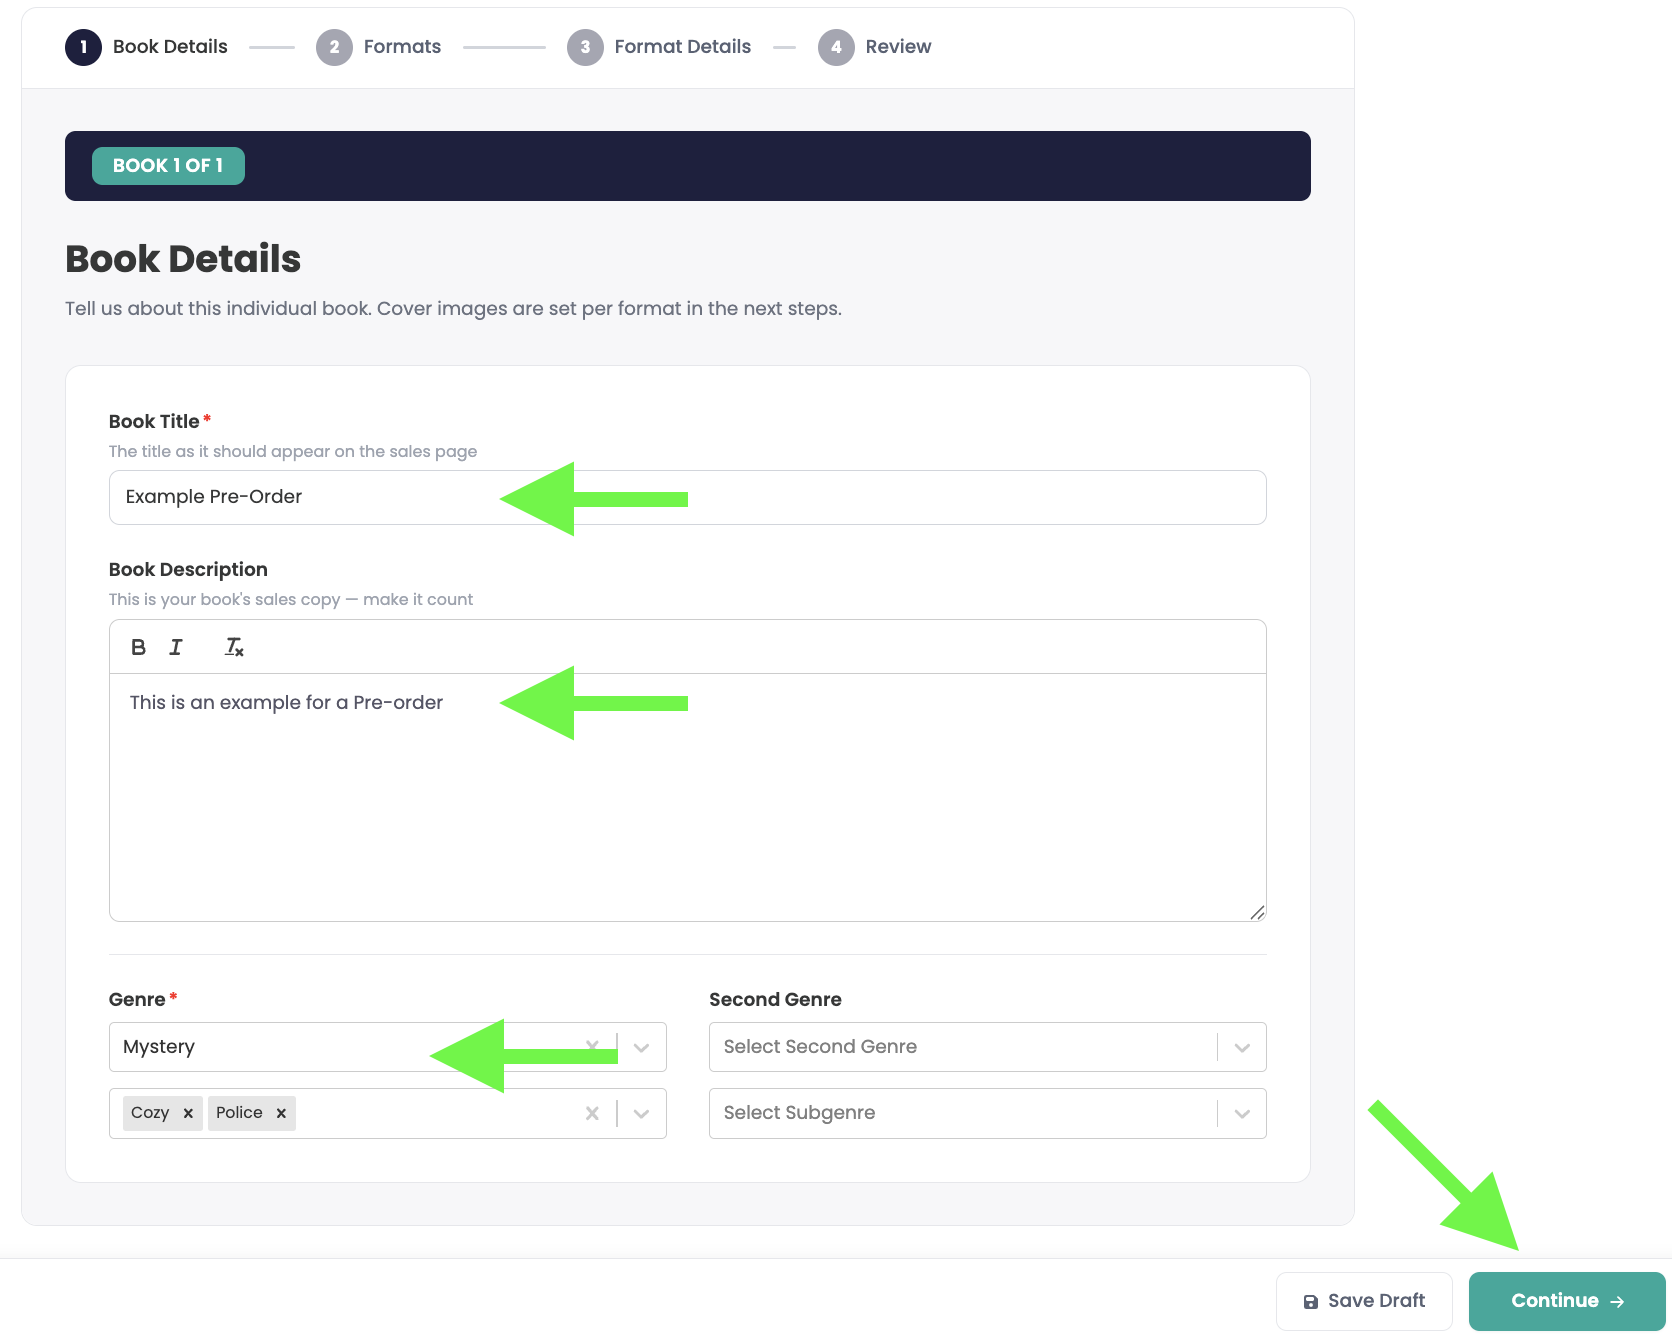
Next we will fill out the book's title, description and genre information.
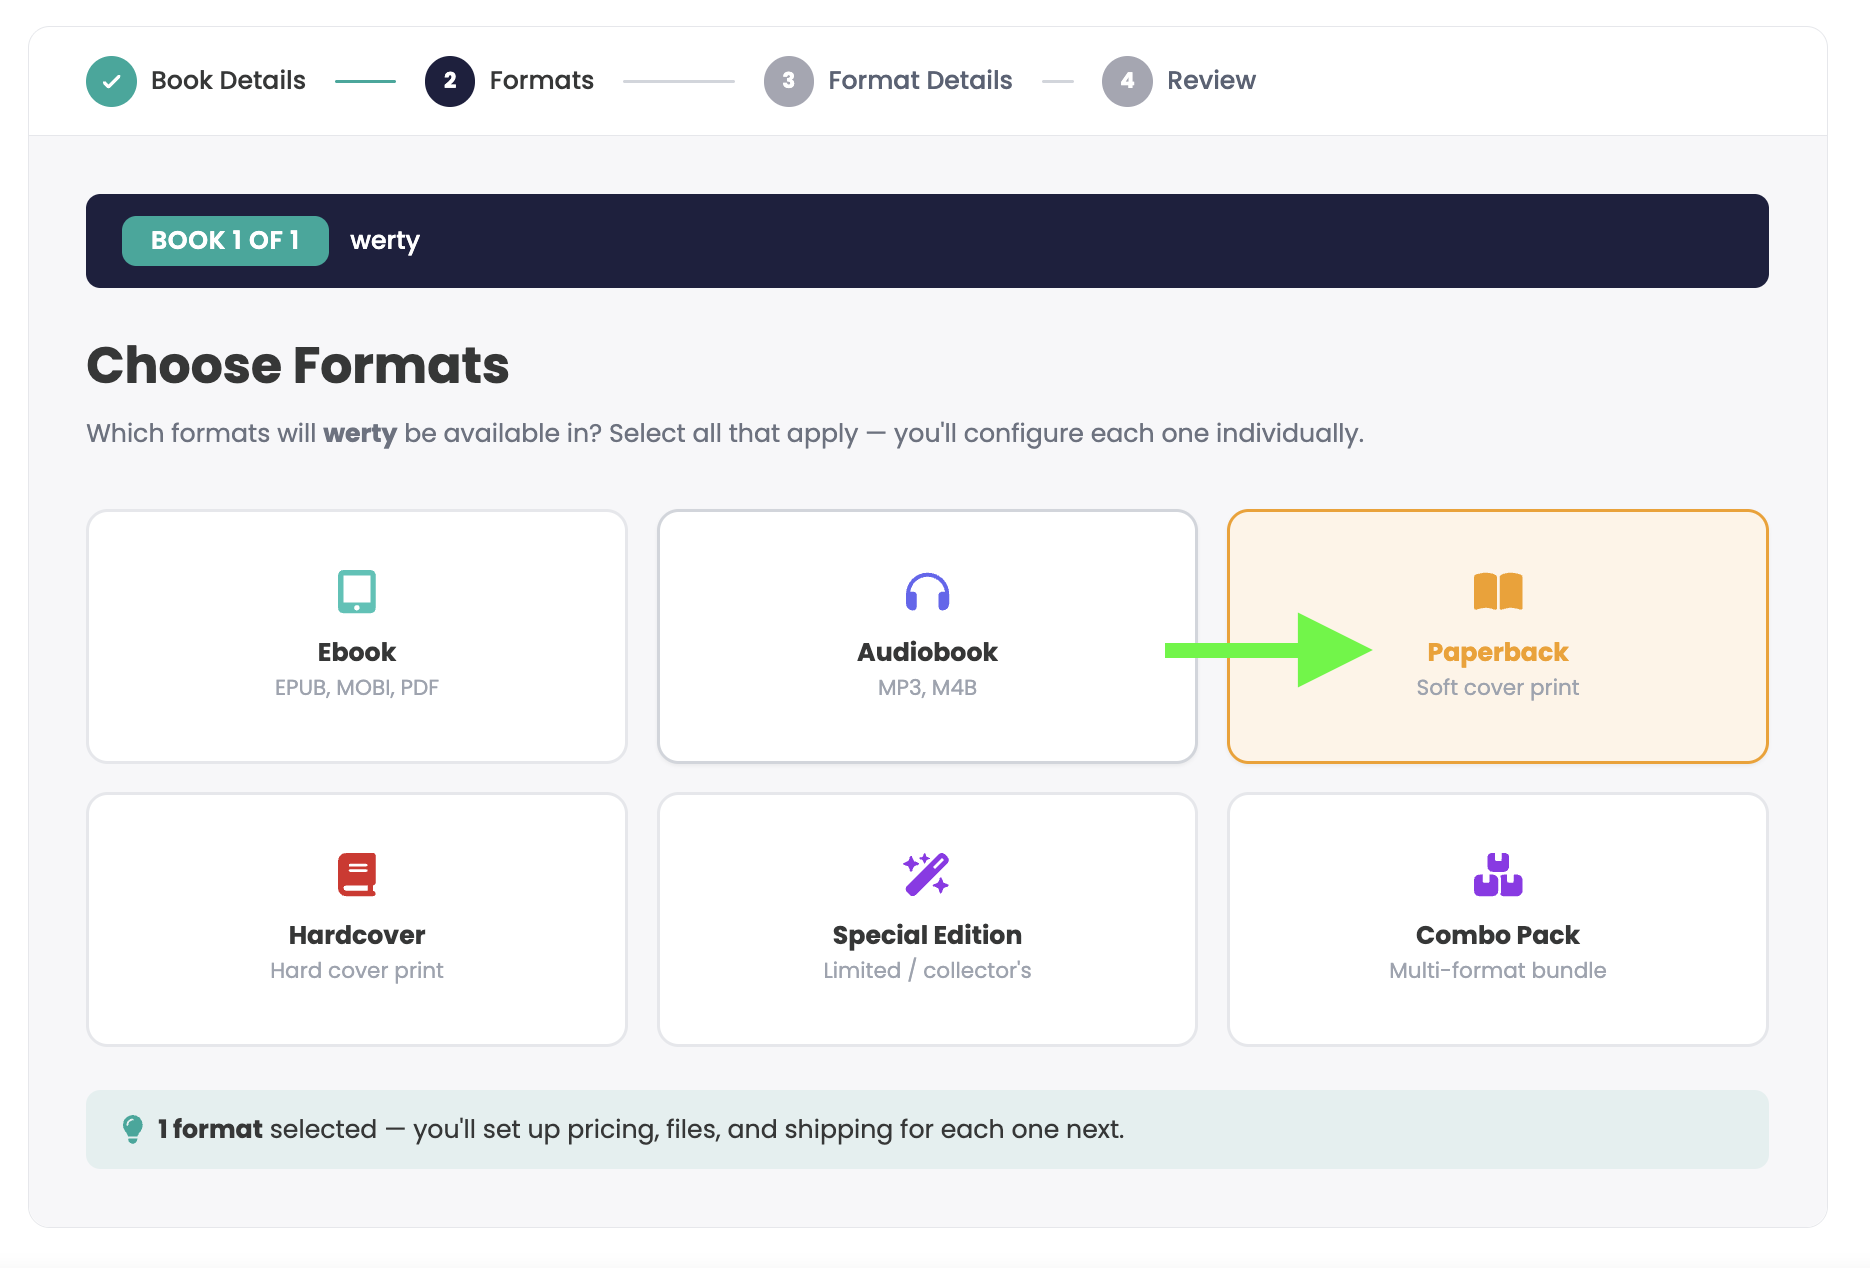
Next, we will select which formats we will be selling for this book. For this example we will just do a paperback, however you can setup as many formats as you are willing to offer.
Note 2: You can always add more formats later — please see the Adding formats to an existing book tutorial.
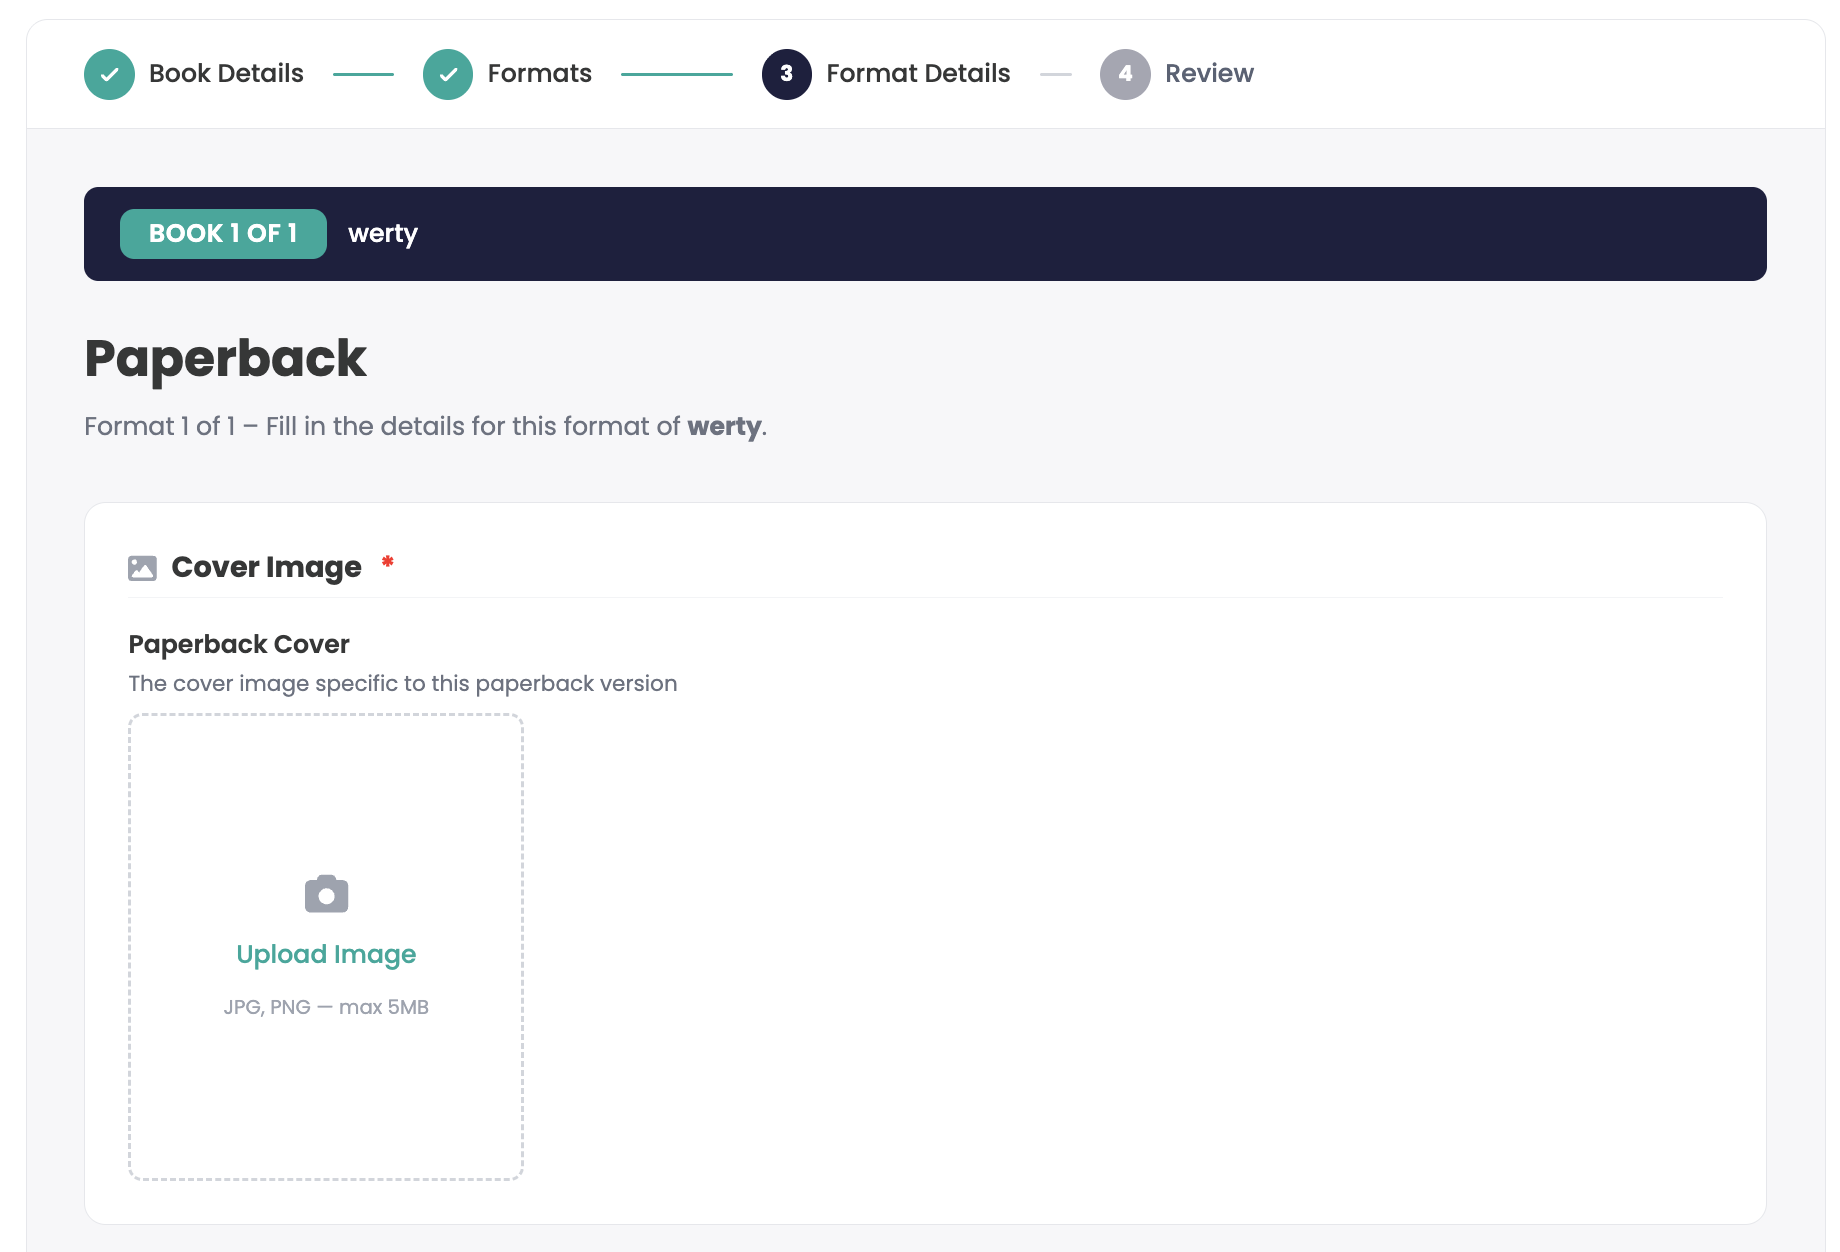
The next page contains the main designations for the book. Start by adding the cover image for this specific format. Covers can vary in design or in size from format to format even for the same book.
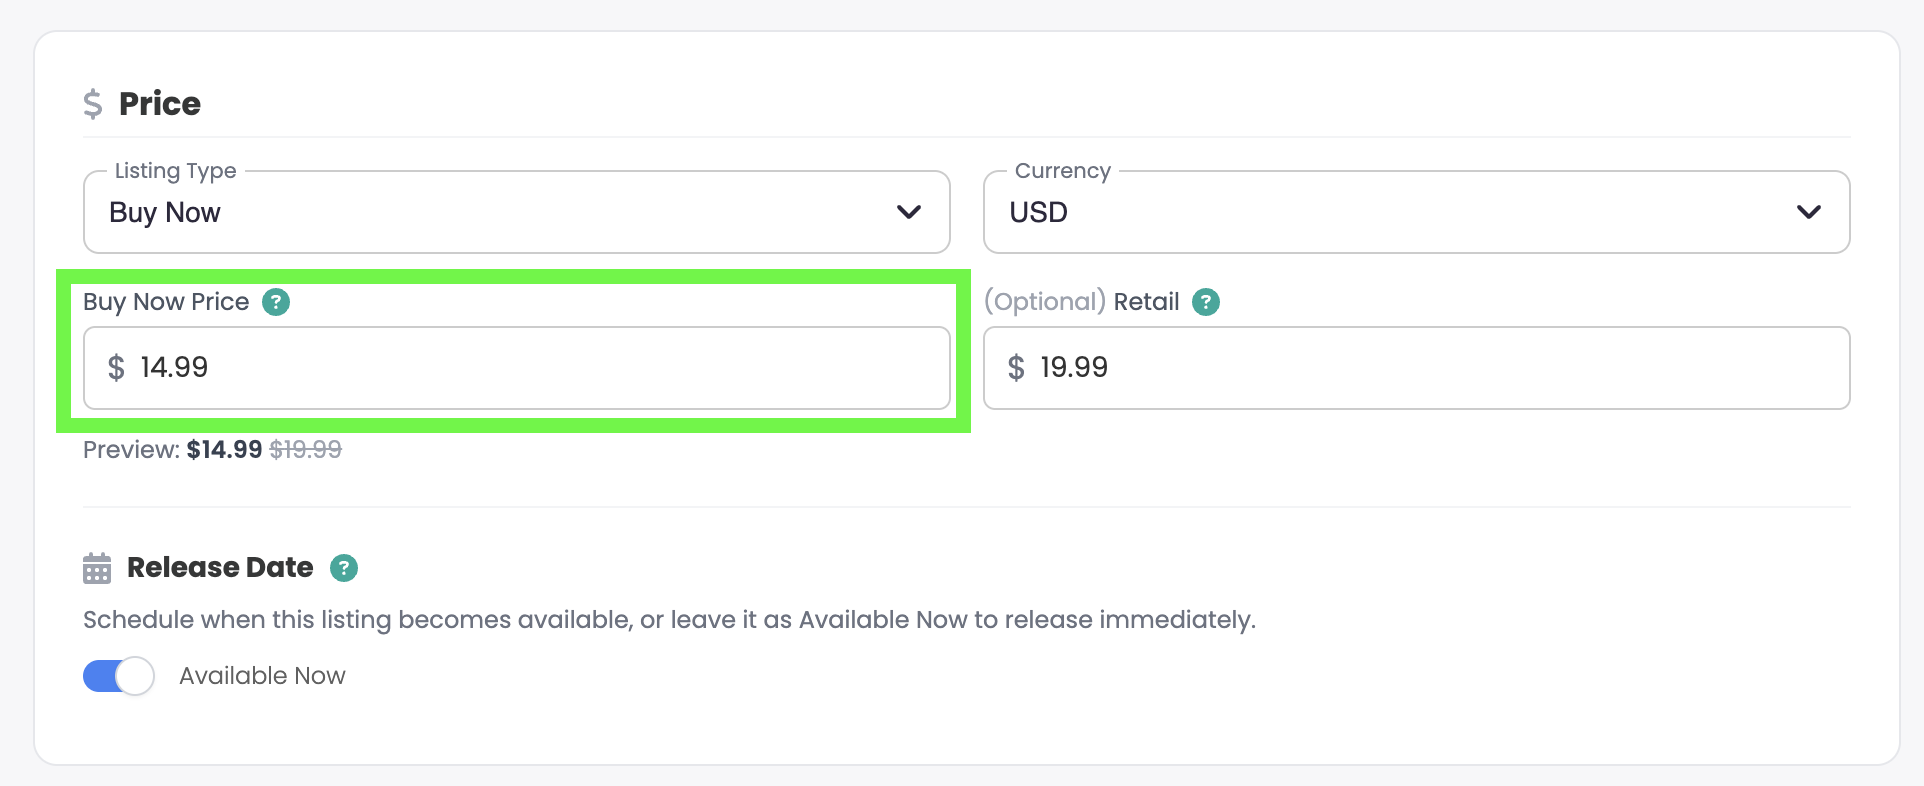
Next you will set the price of the book and establish if the book is a "Buy Now" or a "Pre-order". If the book is a pre-order please see the tutorial for pre-orders. Ensure the "Listing Type" is set to Buy Now.
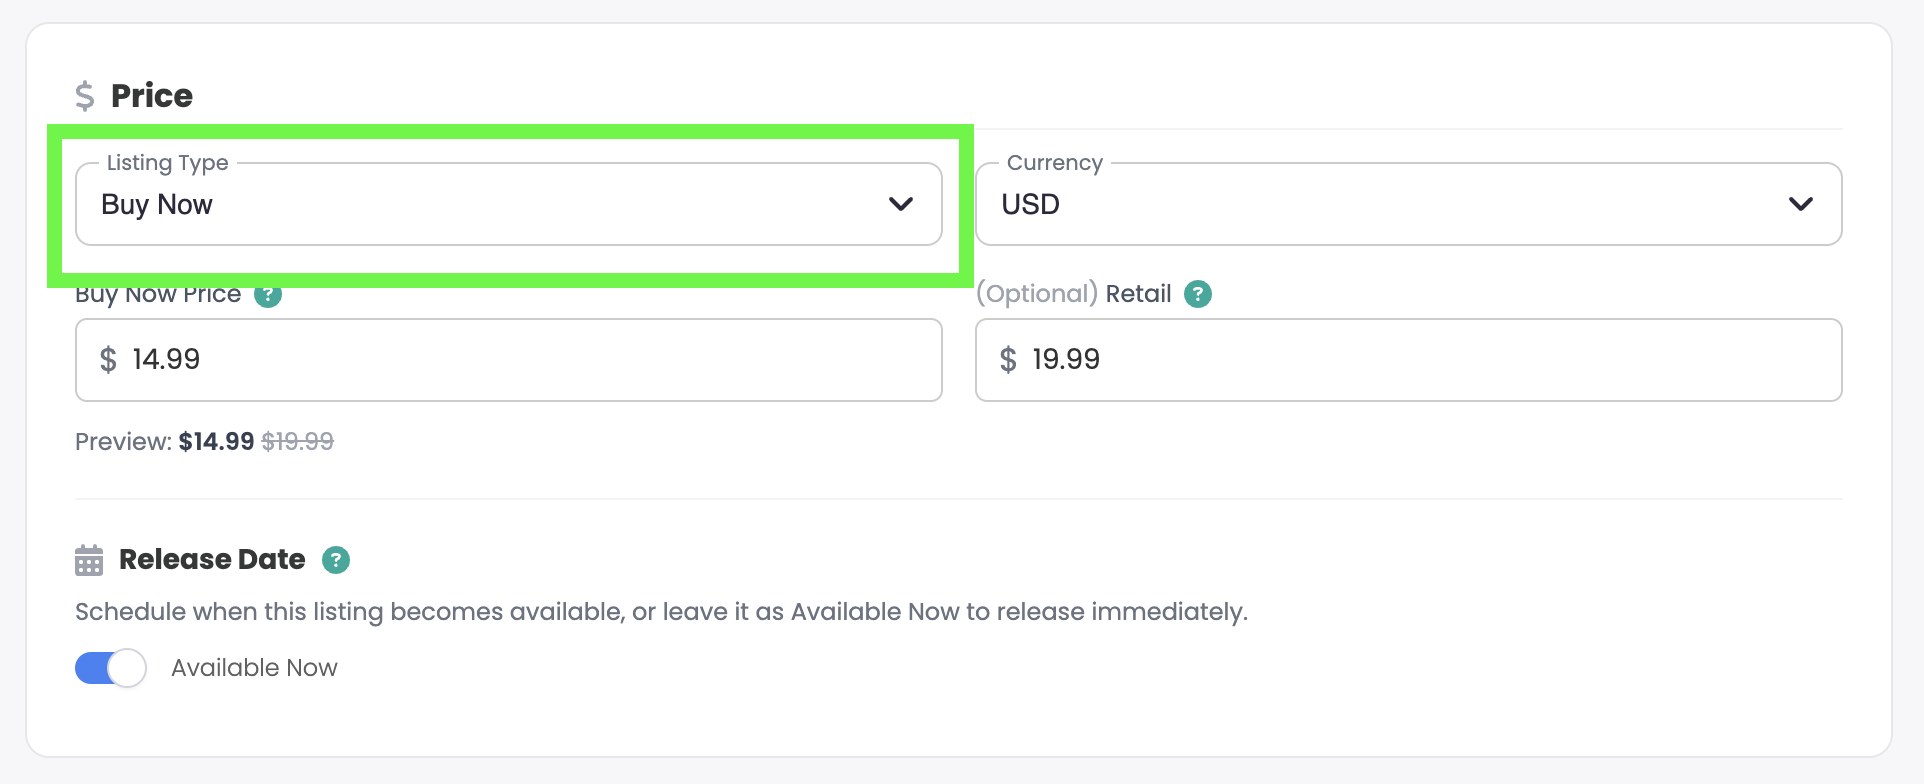
Under "Buy Now Price," enter the amount you would like to receive for each book sold.
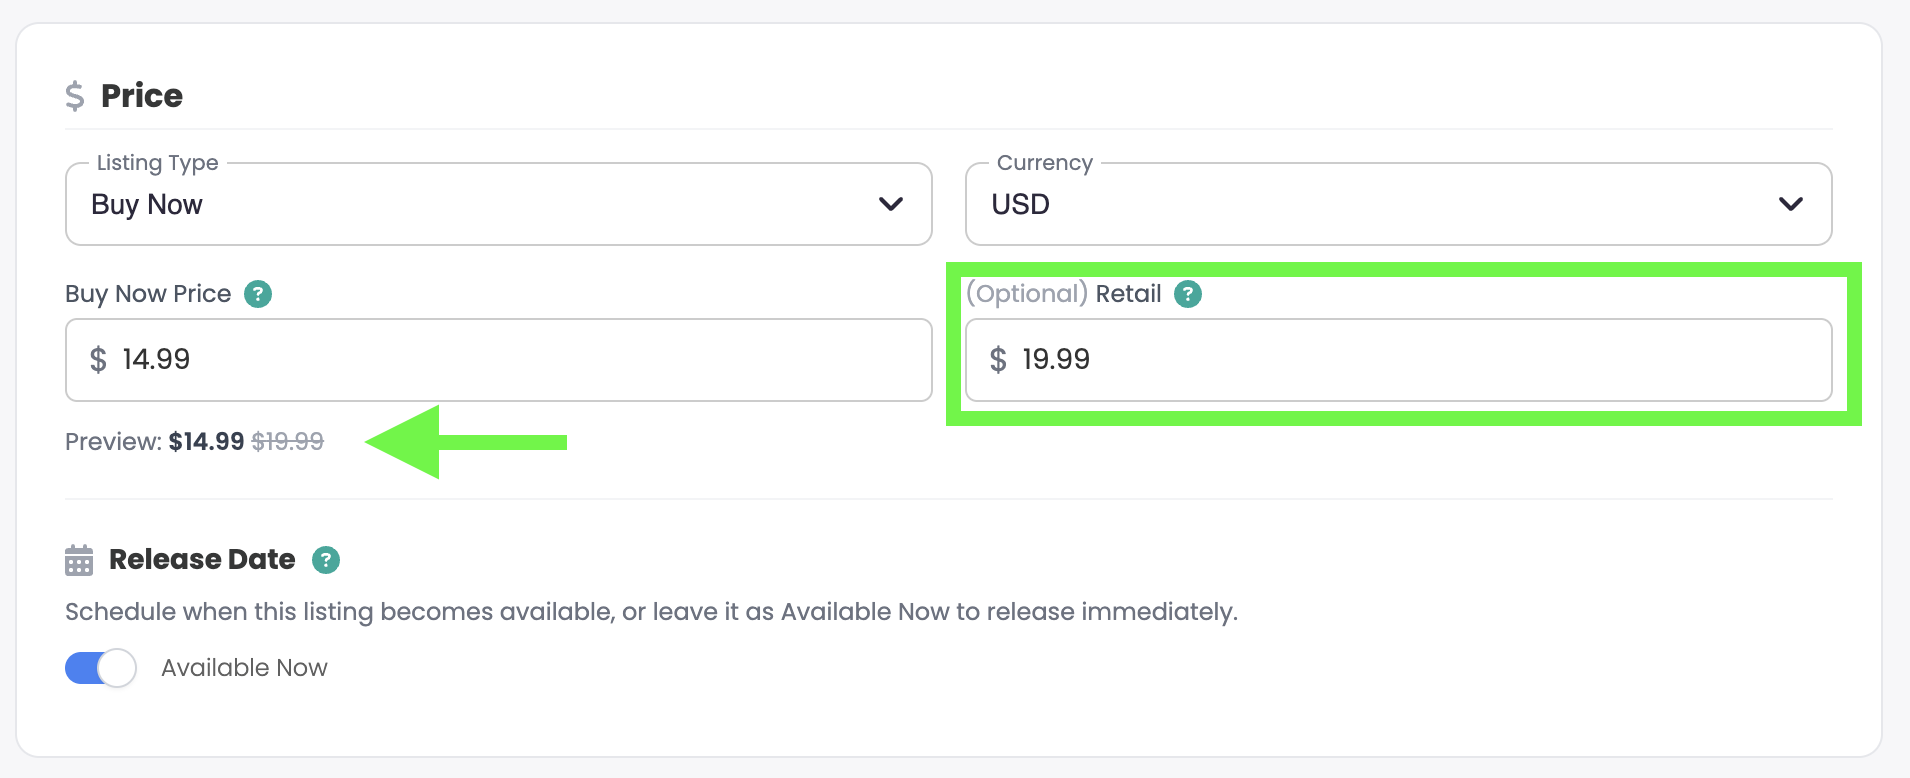
You also can set a retail price. This can be used to showcase the markdown or deal a person would be getting by purchasing this as a pre-order.
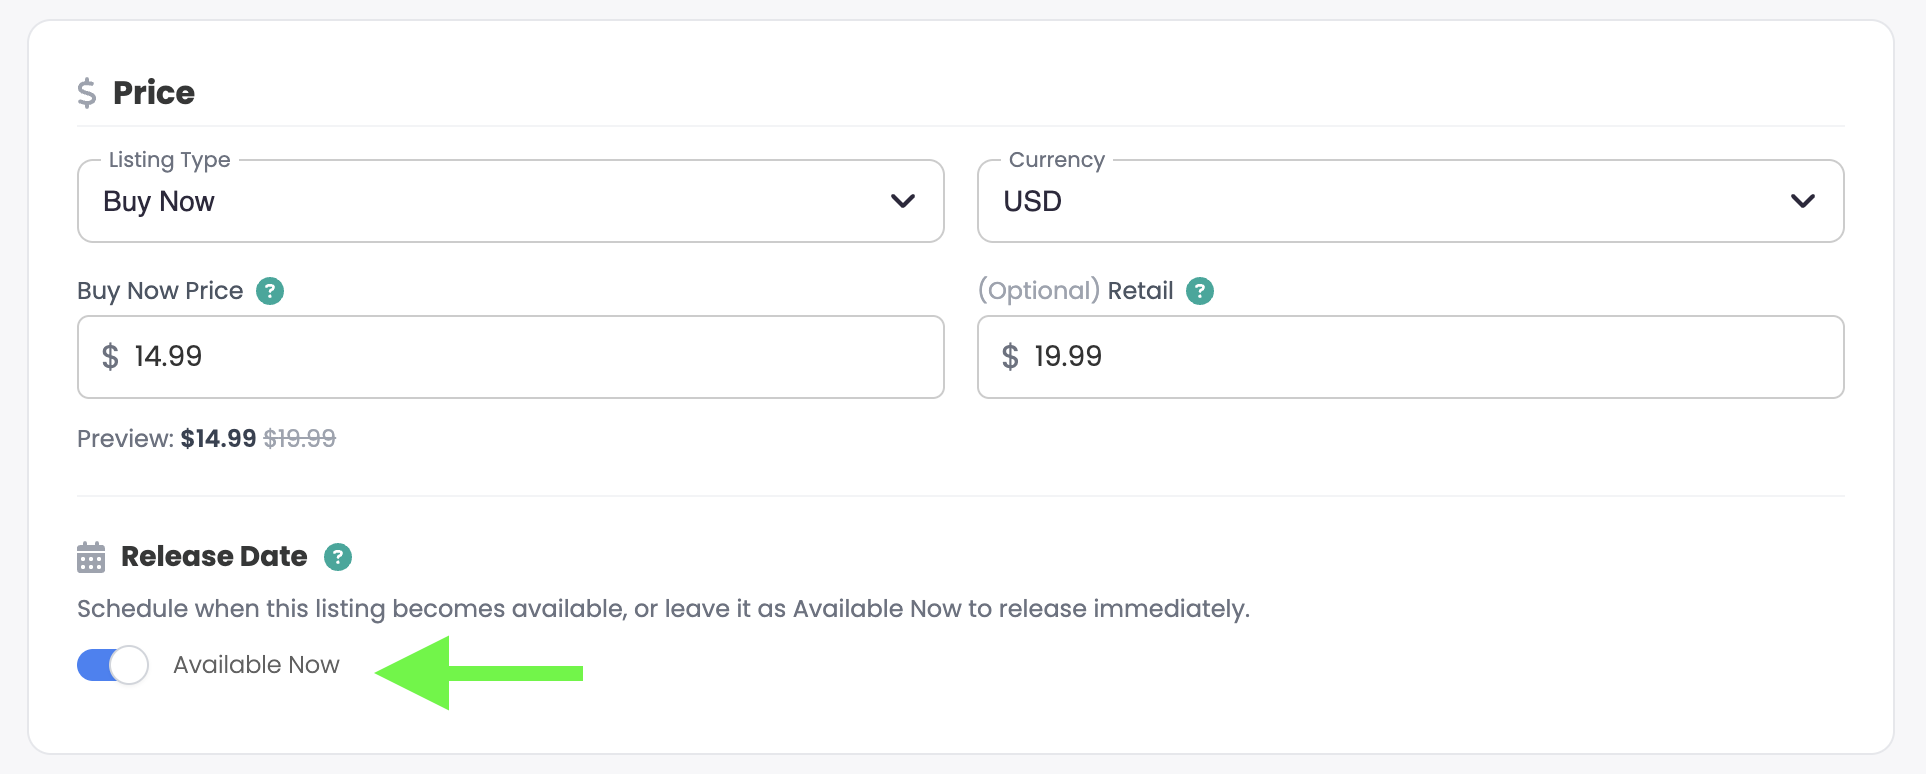
Release date specifies when the content will be available. Toggled on means the book will be available for purchase as soon as this goes live. If you toggle it off it allows you to schedule when the book will be available for sale.
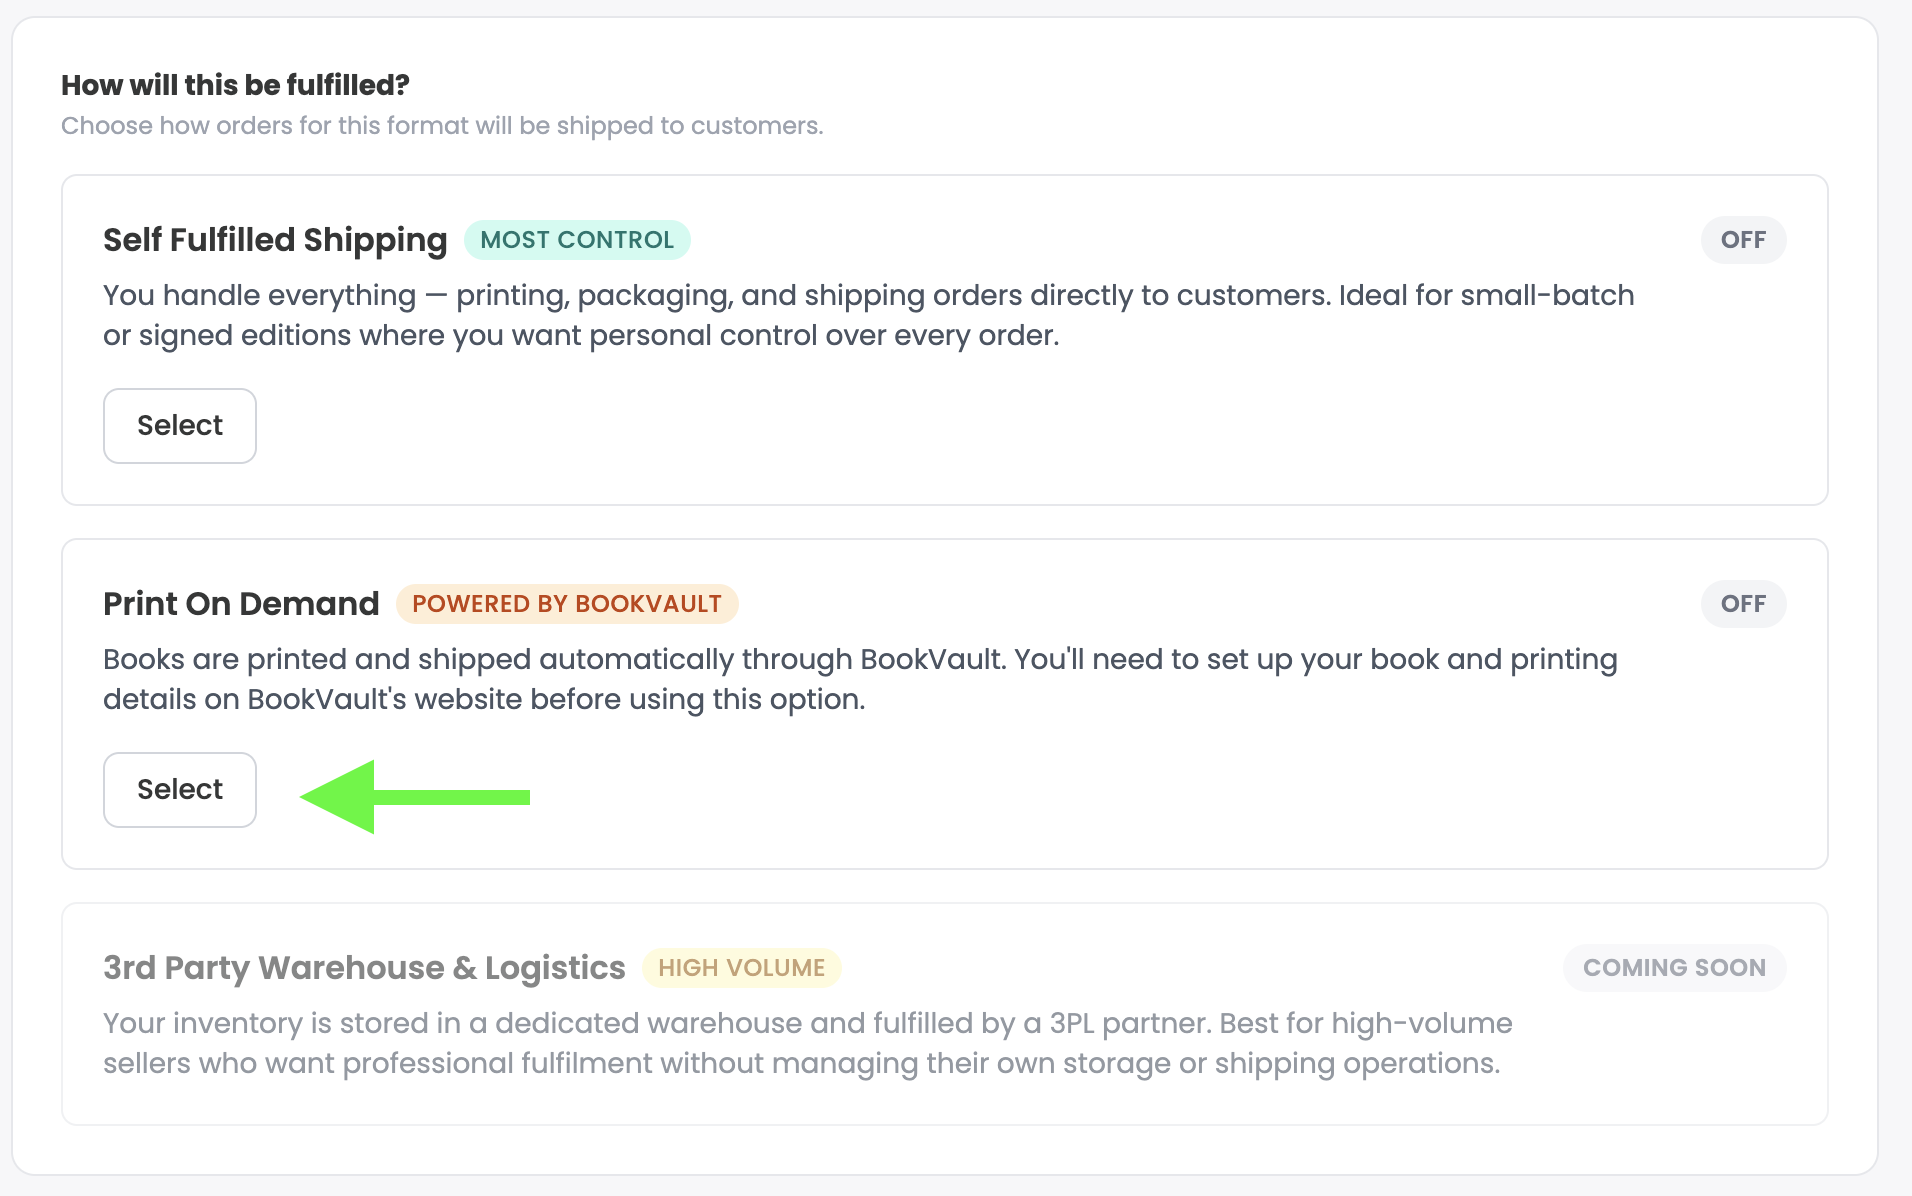
Next you will need to specify how the order will be fulfilled. For books you can select between Self-Fulfilled Shipping or Print on Demand. For this tutorial we will show the print on demand option.
Enter the ISBN/SKU number provided by BookVault.
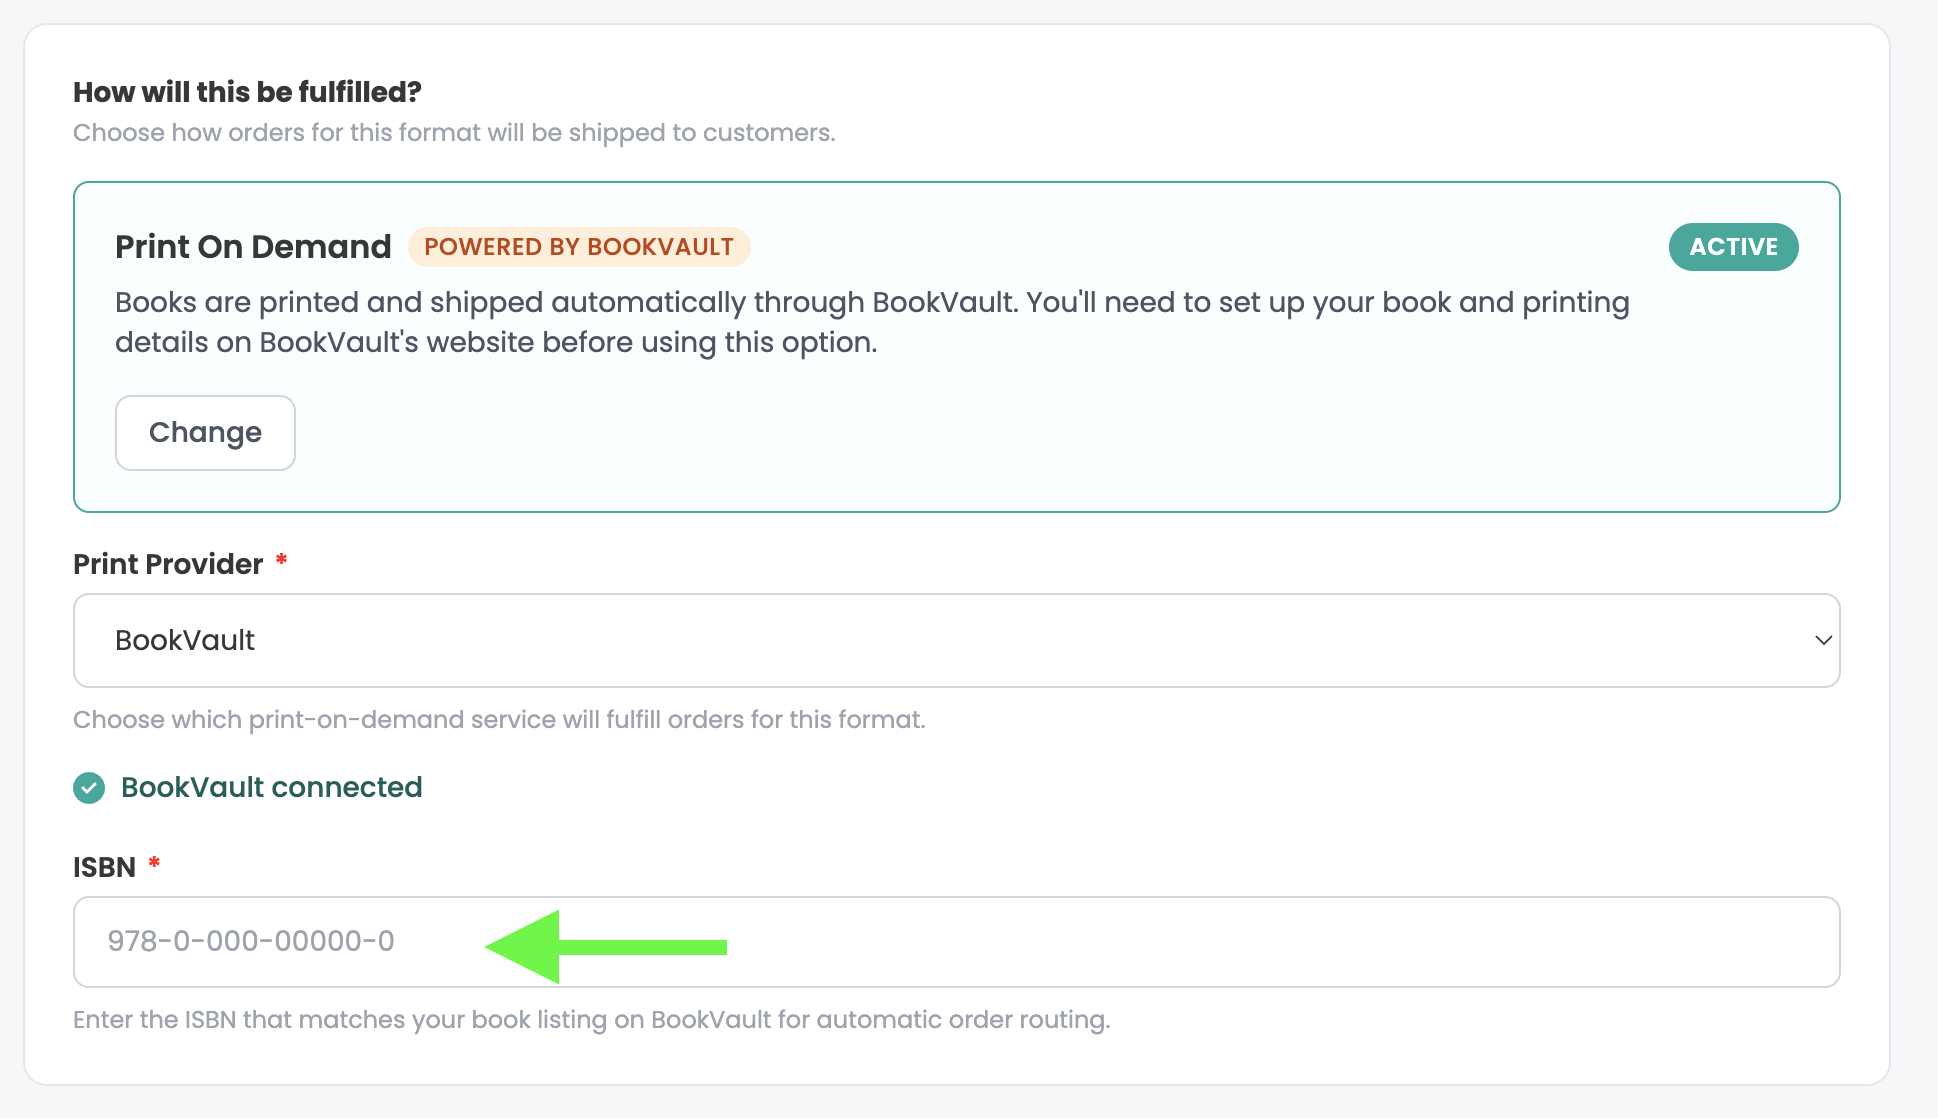
This ISBN/SKU can be found on your BookVault Dashboard under the View Your titles tab.
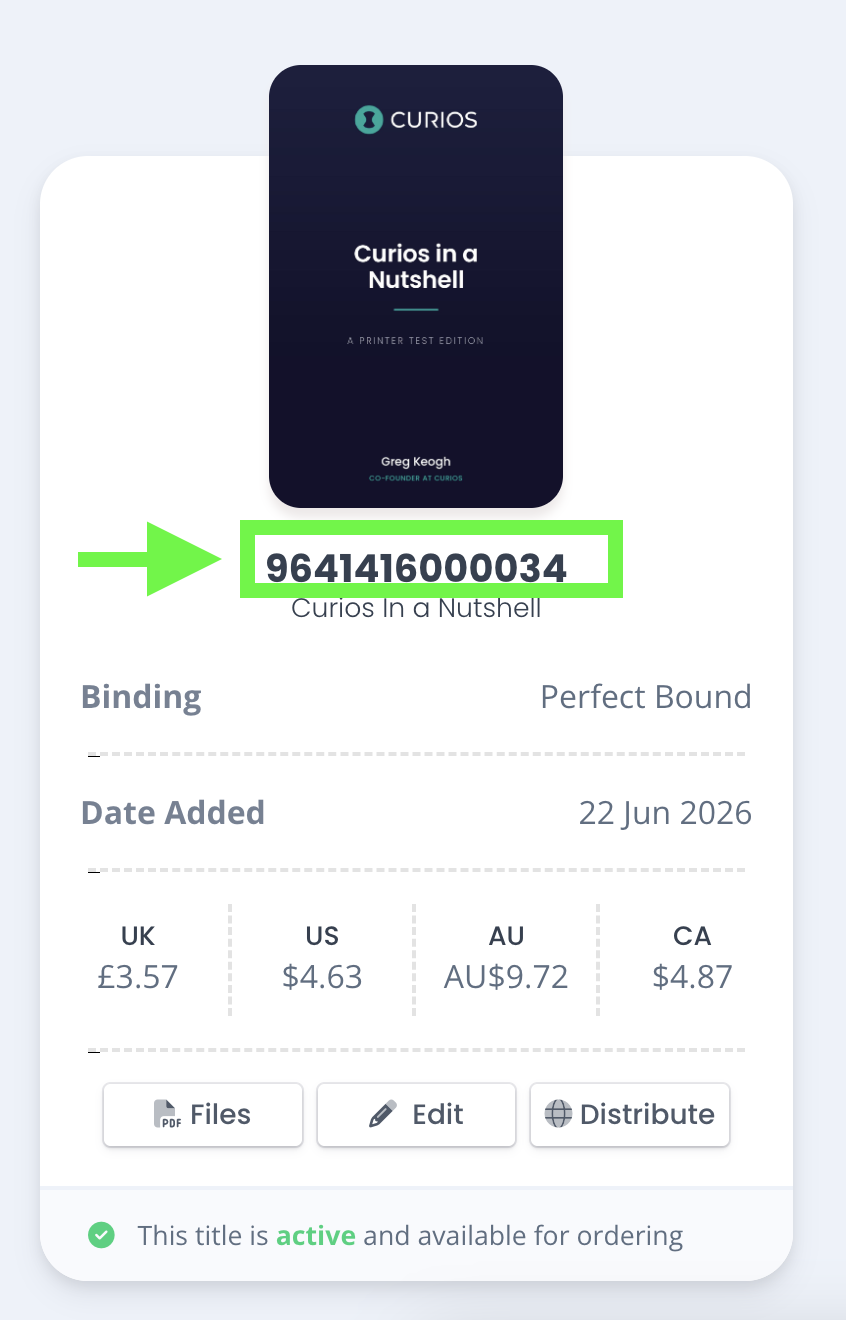
Note: Make sure you match the correct BookVault format to the corresponding format in Curios. Each format (such as paperback, hardcover, or special edition) has its own unique ISBN/SKU in BookVault. When entering an ISBN/SKU in Curios, be sure you're using the one that matches the selected format.
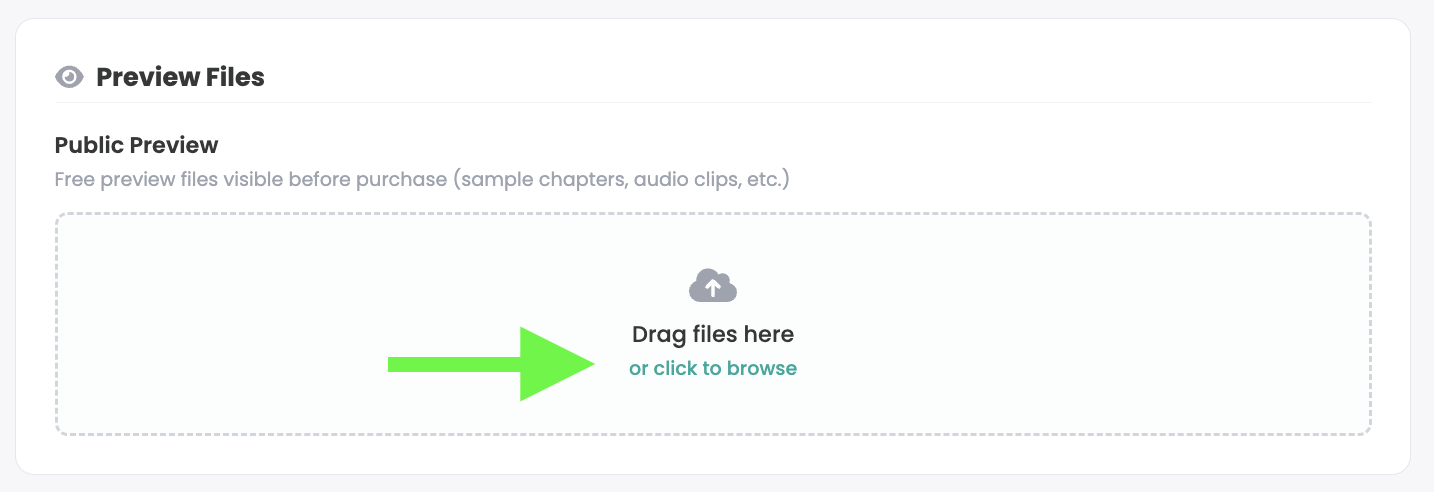
Next is the Preview File area. This is where you would upload any preview files, retail samples for audio, trailer for video — any media that you would like to use to help the buyer understand what they are buying.
Note: For Print on Demand books, if you have a sample epub version of the book, this can be useful here.
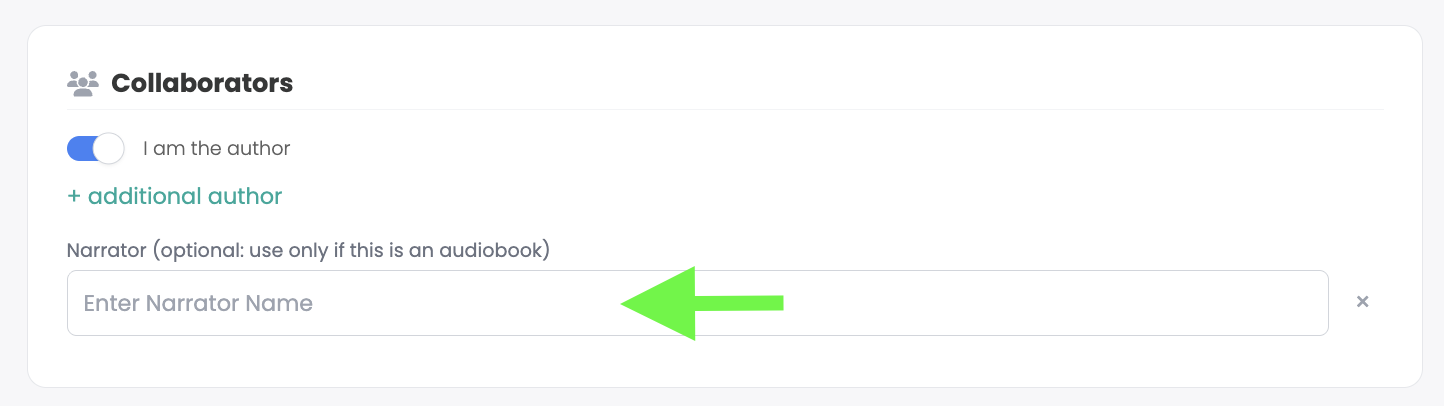
Next is the collaborator section. This is the area where you can add the information about a narrator for an audiobook, or any co-creators that were involved in this product.
If you are using a pen name, you can toggle off the "I am the author" area and enter the name of the author for this specific book.
Next is the permissions area. As this is a physical item the only choice is to specify if an item is public or private.
Public means it shows up on the Curios marketplace and is publicly searchable. Private items require the buyer to have a specific url (link) to see the book. Private items are not searchable or discoverable on the marketplace in any way and are only available to those who have the specific link to the product.

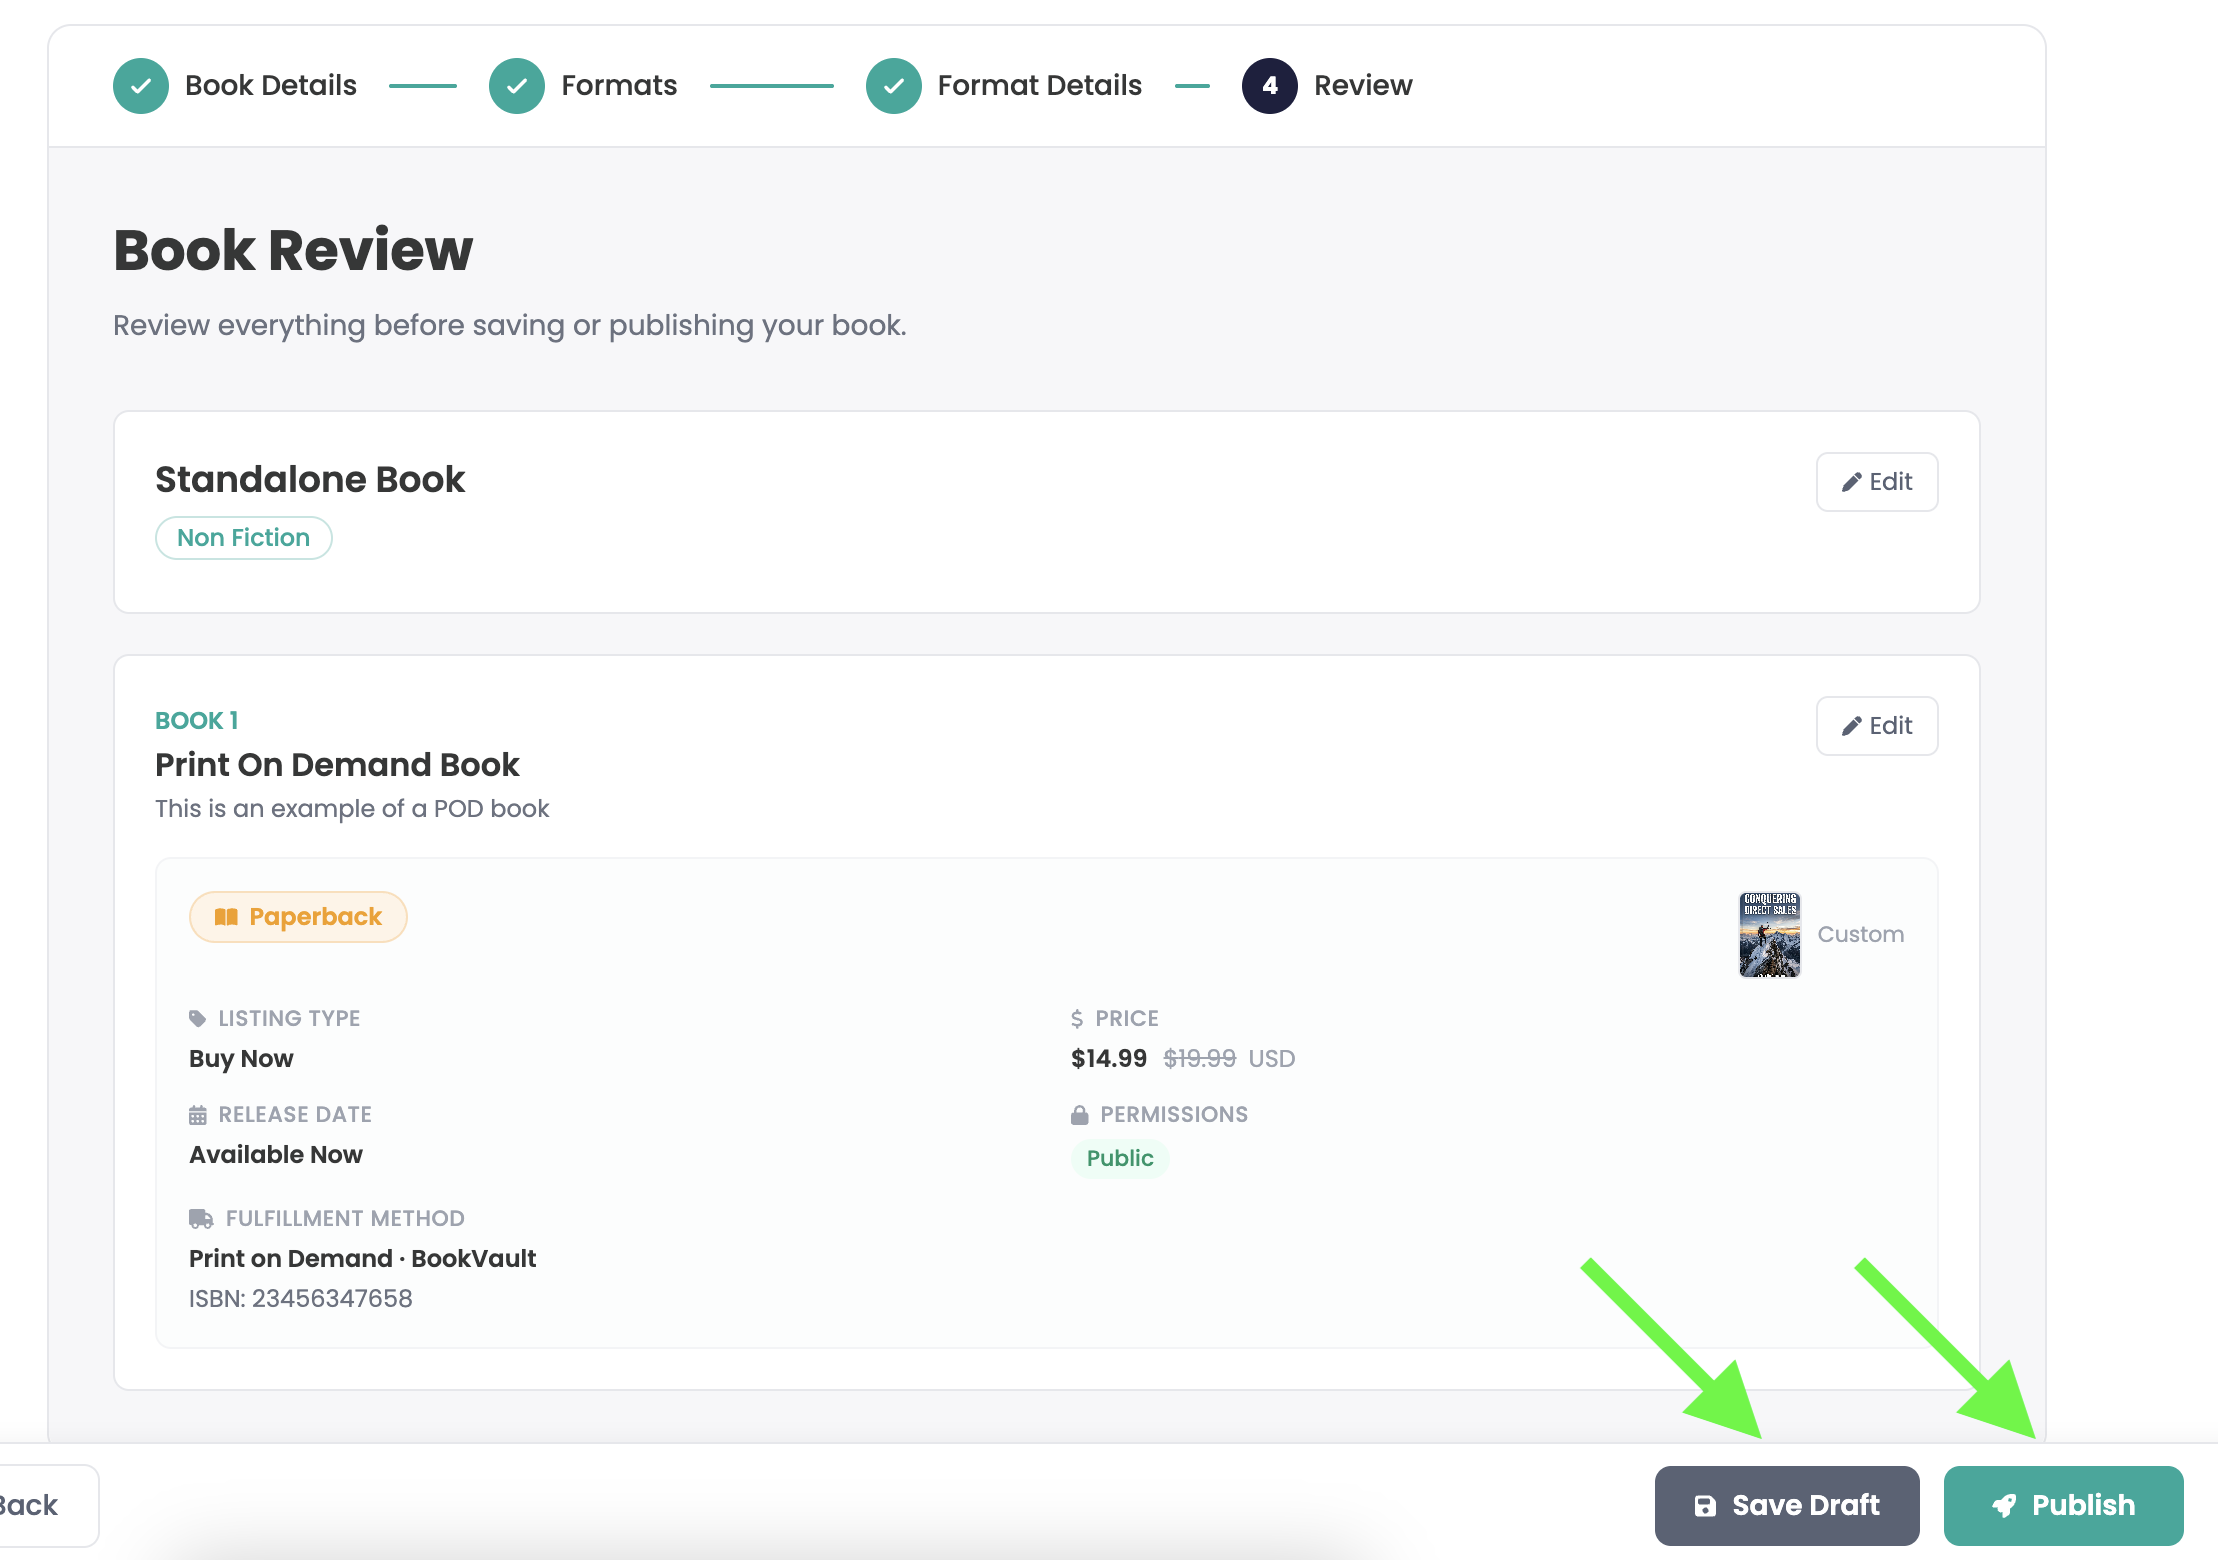
Last, you will be presented a review page. This is useful to double check the information just entered.
Clicking Publish will automatically publish this item to the curios.com marketplace.
Clicking Save Draft will upload all the information for you to then edit or fill in any missing information prior to it going live on the Curios Marketplace.
Note: You are in control of any items you list on Curios. You can change your pricing, content, dates or anything at any time, even after you publish the items.
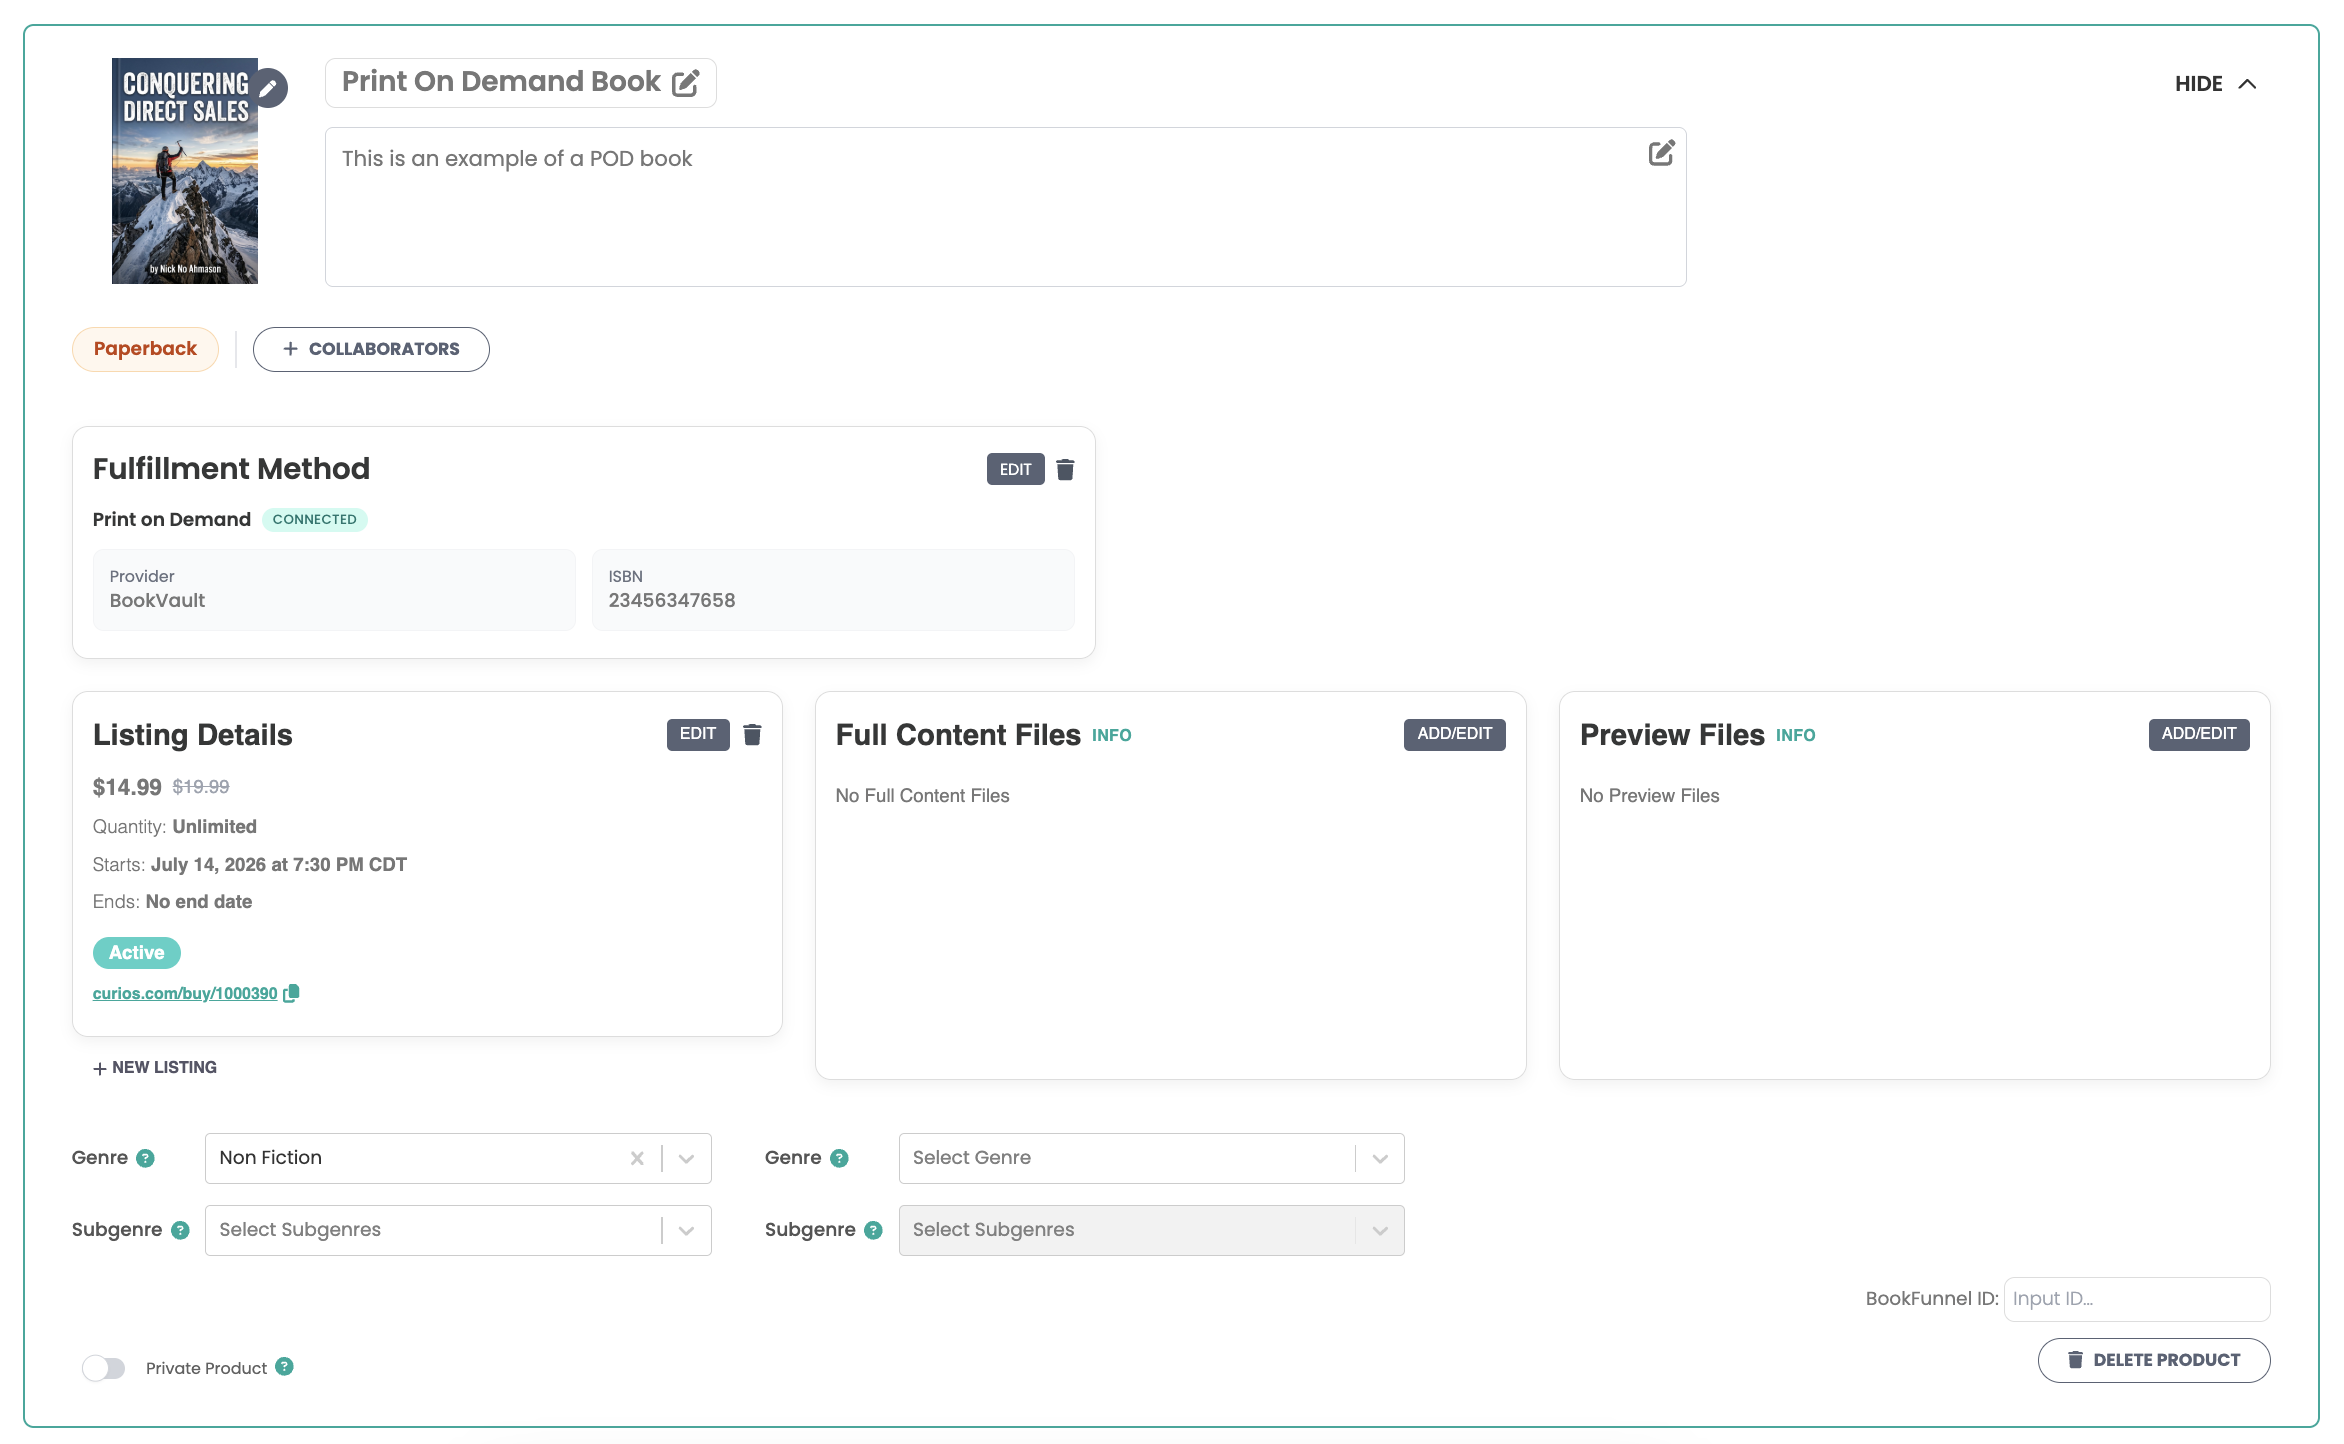
If you ever need to change any information for your print on demand book, simply click on the item on the Curios studio dashboard and you will see the Product Detail page where you can edit or make any changes needed.
Let's say you are selling a $15 paperback on Curios.
When a person buys the book, they will pay Curios:
For this order Curios will send $20.50 to your bank account.
BookVault will charge your cards on file the print price, shipping costs, and the print pack cost. You will see a charge for something like $11.63 which breaks down into:
You will net $8.87 for this book.
Again, we are working on having the BookVault costs come straight from the order amount collected on Curios and not from your credit card, but this will take a few months before it is in place.
Also, final note: BookVault lumps the pick/pack cost in with the shipping costs. We brought up to them that it should be a separate line item or be included in the print estimate for the book, but for now that is just how they do it. For what it's worth, if a customer orders several copies, this structure allows them to only charge you one pick/pack, which does save you money.
Here is their exact breakdown of pick/pack costs per book, per region:
This tutorial will show you how to connect BookVault to Curios and sell paperbacks, hardcovers, special editions, and other printed books using print-on-demand fulfillment.
Your books are printed only after a reader places an order.
BookVault prints, packs, and ships each order directly to your reader.
Curios manages the transaction, taxes, customer support, fraud, and communication with BookVault.
The purchase is completed through your Curios storefront.
Curios handles payment processing, applicable taxes, customer support, and fraud protection.
The book is printed, packed, and shipped directly to the reader.
Books typically take about 6 days to print and pack, so there is a delay from purchase to when they ship. Curios does all we can to inform the reader of this so their delivery expectations are set appropriately.
Go to https://auth.bookvault.app/authorize and then click the "Sign Up Now!" link toward the top. You'll get walked through the account creation process.
They will send you an email with a button to create a password.
Note: This kind of didn't work for me, so I had to go back to https://auth.bookvault.app/authorize and do an "I forgot my password" to get in. Hopefully that was just due to me testing several accounts.
Once you are in, you will see the BookVault Dashboard and you will want to click "Add a title".
For each title, you will be walked through making selections for paperback, hardcover and more. You will need to walk through the set up for each book AND each format (paperback, hardcover, etc.).
IMPORTANT NOTE: If you use your own ISBN or use a BookVault SKU, you can use the code Curios-T100 to avoid paying any setup fees on BookVault.
Once you have at least one title set up and ready, it will say "Active and Available for Ordering" on your BookVault dashboard.
Go to the Payments Tab on the BookVault dashboard. Add your payment information for BookVault printing. You will need to add payment in three places.
Again, you will need to add the payment information in all three locations. (This is a BookVault requirement and is outside of our control for now.)
Note: For each print-on-demand order, BookVault will charge your payment method on file for the printing, packing, and shipping costs. Orders are only sent to BookVault after they have been successfully processed on Curios, so you will have already received the funds from the sale before these charges occur. A detailed breakdown of how this process works is included at the end of this tutorial.
Note 2: We are urgently working with BookVault's team to have the shipping costs and printing costs come directly from Curios so you would not need a credit card on file with them. This will likely be in place by fall of 2026.
Go to https://portal.bookvault.app/connections/page/curios
or click on the "Connect BookVault" button on the Shipping manager tab on studio.curios.com.
Go to studio.curios.com and login with your email address and then enter the code provided.
Click +Publish/Add New Product option in the left hand menu.
Select Book from the available options.
We are going to skip the Series step for this tutorial, but if this book is part of an existing series you can select the series on this page or make a new one if needed.
Next we will fill out the book's title, description and genre information.
Next, we will select which formats we will be selling for this book. For this example we will just do a paperback, however you can setup as many formats as you are willing to offer.
Note 2: You can always add more formats later — please see the Adding formats to an existing book tutorial.
The next page contains the main designations for the book. Start by adding the cover image for this specific format. Covers can vary in design or in size from format to format even for the same book.
Next you will set the price of the book and establish if the book is a "Buy Now" or a "Pre-order". If the book is a pre-order please see the tutorial for pre-orders. Ensure the "Listing Type" is set to Buy Now.
Under "Buy Now Price," enter the amount you would like to receive for each book sold.
You also can set a retail price. This can be used to showcase the markdown or deal a person would be getting by purchasing this as a pre-order.
Release date specifies when the content will be available. Toggled on means the book will be available for purchase as soon as this goes live. If you toggle it off it allows you to schedule when the book will be available for sale.
Next you will need to specify how the order will be fulfilled. For books you can select between Self-Fulfilled Shipping or Print on Demand. For this tutorial we will show the print on demand option.
Enter the ISBN/SKU number provided by BookVault.
This ISBN/SKU can be found on your BookVault Dashboard under the View Your titles tab.
Note: Make sure you match the correct BookVault format to the corresponding format in Curios. Each format (such as paperback, hardcover, or special edition) has its own unique ISBN/SKU in BookVault. When entering an ISBN/SKU in Curios, be sure you're using the one that matches the selected format.
Next is the Preview File area. This is where you would upload any preview files, retail samples for audio, trailer for video — any media that you would like to use to help the buyer understand what they are buying.
Note: For Print on Demand books, if you have a sample epub version of the book, this can be useful here.
Next is the collaborator section. This is the area where you can add the information about a narrator for an audiobook, or any co-creators that were involved in this product.
If you are using a pen name, you can toggle off the "I am the author" area and enter the name of the author for this specific book.
Next is the permissions area. As this is a physical item the only choice is to specify if an item is public or private.
Public means it shows up on the Curios marketplace and is publicly searchable. Private items require the buyer to have a specific url (link) to see the book. Private items are not searchable or discoverable on the marketplace in any way and are only available to those who have the specific link to the product.
Last, you will be presented a review page. This is useful to double check the information just entered.
Clicking Publish will automatically publish this item to the curios.com marketplace.
Clicking Save Draft will upload all the information for you to then edit or fill in any missing information prior to it going live on the Curios Marketplace.
Note: You are in control of any items you list on Curios. You can change your pricing, content, dates or anything at any time, even after you publish the items.
If you ever need to change any information for your print on demand book, simply click on the item on the Curios studio dashboard and you will see the Product Detail page where you can edit or make any changes needed.
Let's say you are selling a $15 paperback on Curios.
When a person buys the book, they will pay Curios:
For this order Curios will send $20.50 to your bank account.
BookVault will charge your cards on file the print price, shipping costs, and the print pack cost. You will see a charge for something like $11.63 which breaks down into:
You will net $8.87 for this book.
Again, we are working on having the BookVault costs come straight from the order amount collected on Curios and not from your credit card, but this will take a few months before it is in place.
Also, final note: BookVault lumps the pick/pack cost in with the shipping costs. We brought up to them that it should be a separate line item or be included in the print estimate for the book, but for now that is just how they do it. For what it's worth, if a customer orders several copies, this structure allows them to only charge you one pick/pack, which does save you money.
Here is their exact breakdown of pick/pack costs per book, per region:
No credit card required. Join creators building real businesses on their own terms.